For a couple of years I have been playing with the idea of getting an ultrawide lens for my Hasselblad X2D. As much as I love my XCD 21, sometimes it just isn’t wide enough. Especially for the widest panoramas. I could always stitch a pano, but as discussed in my last post (“Ultrawide lenses for Hasselblad X?”), stitching isn’t always a perfect option. Particularly when there are moving elements in the frame, rapid change in light, or when straight lines (horizon, buildings etc.) are important. So, I have researched a few different options and landed on the Laowa 12-24mm f5.6 zoom-lens. This is a full-frame lens. No medium format lenses that wide are available. The image circle is quite a lot smaller than we are used to with the XCD-lenses, so there will be a hard vignette and the need to crop the files from the 33x44mm sensor.
The versatility of a zoom is obvious, but I actually got this mostly to use at the 12mm end. Why not an ultrawide prime then? Well, several reasons: First, this lens is said to be optically quite good, at least at it’s widest end, when compared to the 12mm primes available. Second, for a zoom it is still very small and lightweight. Third, it takes 77mm screw-on filters. That is important to me as I intend to use it on e.g. long exposure seascapes. I’m done with carrying special filter-holders for each lens I use. Forth, in case I want a tad longer focal length than 12mm for optimal composition, I can zoom in a bit and avoiding cropping more than necessary. For even longer focal lengths, approaching 16-17mm (in full frame terms) and beyond, I will of course rather use my XCD 21 or 30mm. Therefore, in this post, I will only discuss the lens at it’s widest end, 12mm.
I will test it in it’s full focal length-range at some point. I might see the need for the full zoom range on special occasions. Such at on long hikes or travels to destinations where wide lenses are mostly redundant. I haven’t used it on anything but it’s 12mm setting so far, but I’ll make an article about the full range when I have looked into it.
As usual, this is not a full, technical, know-it-all review. I have only taken a few real-life test shots, representative for how I would usually use such a lens. The results are studied in order to learn about the lens’ stronger and weaker sides, and to see if it is good enough for me in certain situations. I simply share it here in case anyone else should happen to be in the same market and find it interesting.
Size, build and function
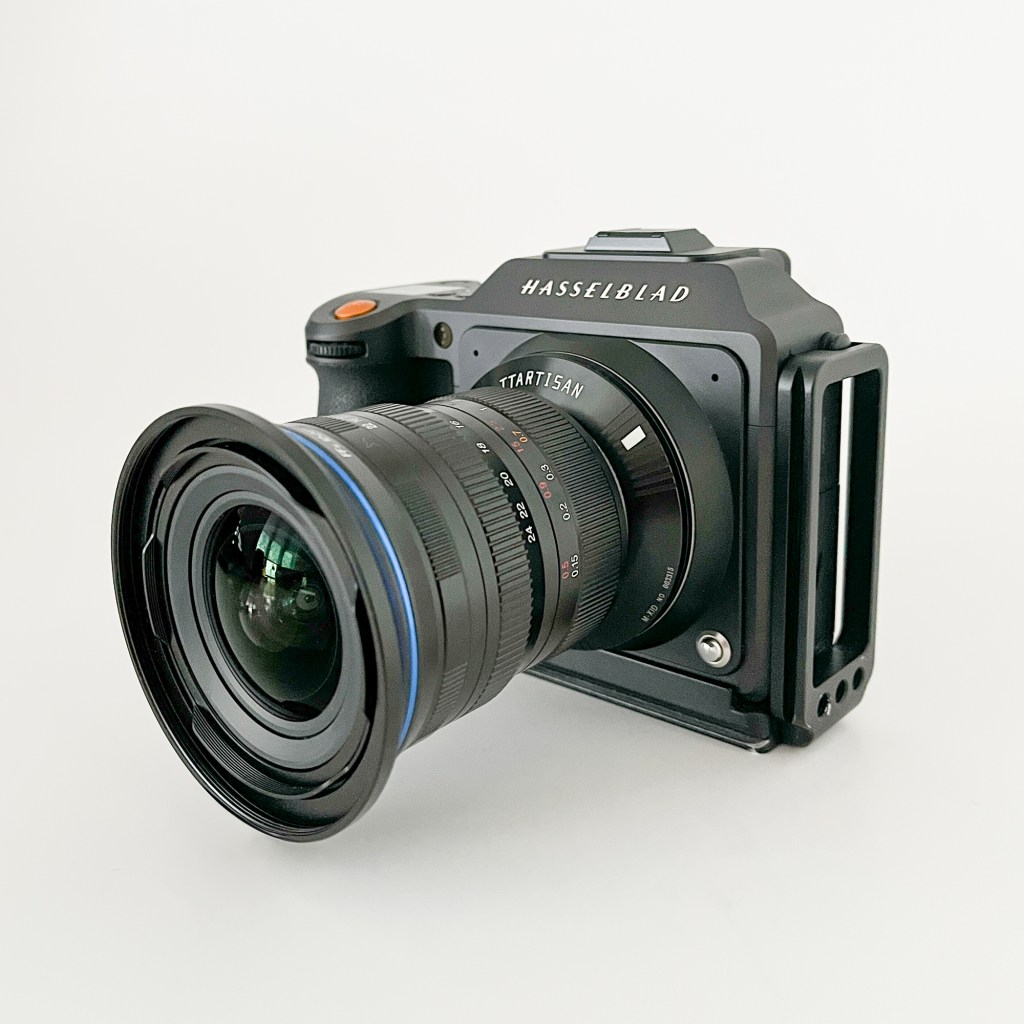
The Laowa 12-24mm f5.6 zoom comes in various full-frame mounts: Leica M, Sony E, Nikon Z, Canon R and L-mount. The lens is readily available new from the producer (Venuslens), or from one of the major retailers, for 649-699 USD (depending on the mount). I chose the Leica M-mount and the TT-artisan Leica M to Hasselblad X adapter. I was pleasantly surprised by this adapter. For only 36 USD you get a precisely machined piece of hardware. Very tight fit, absolutely no movement. No problem with infinity focus. There are certainly more expensive options out there, but i honestly can’t see what they can do better. There are no electronic communication between the lens and the camera body with any adapters, so you are left with manual focus, no EXIF information and exposure in manual or aperture priority. And of course, electronic shutter on the X2D. None of these things bother me, as I always work from a tripod and mostly on stationary subjects. I am used to a slow work-pace and take my time to get focus and exposure correctly.
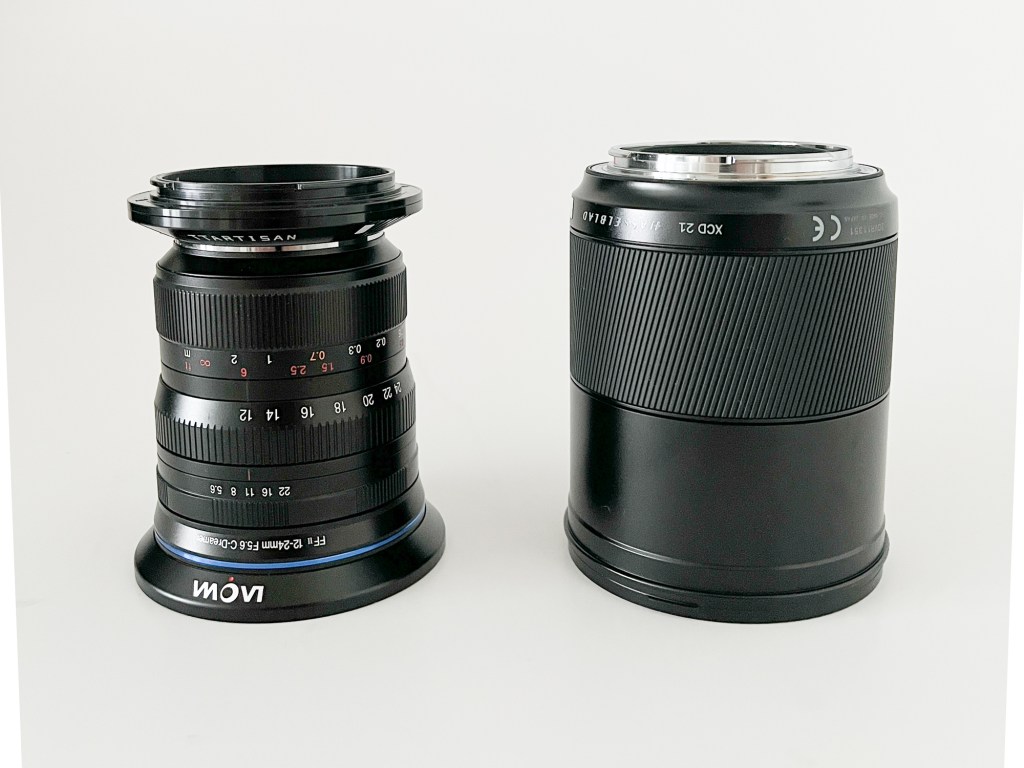
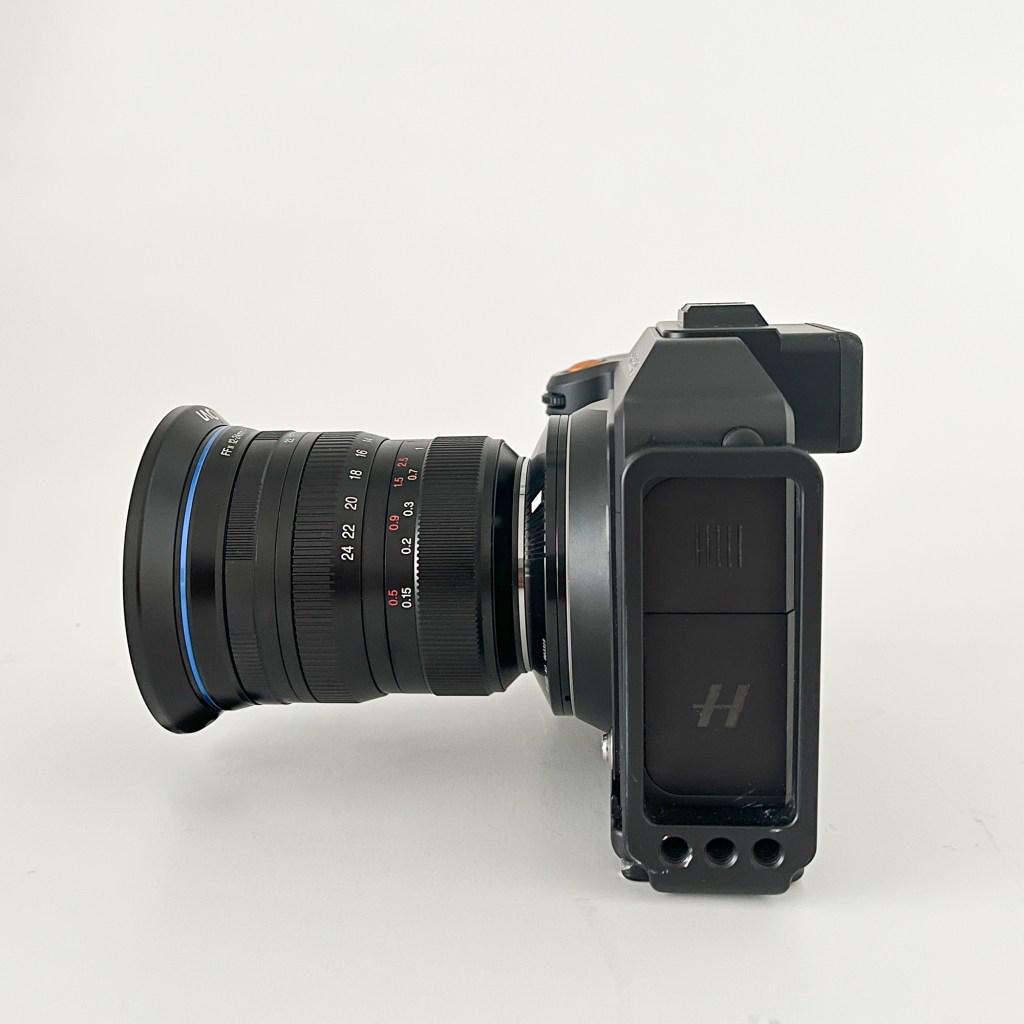
The lens is quite small and lightweight, and mounts on the X2D without feeling unbalanced or awkward. It’s a full metal construction, and gives a very solid, high-end impression when holding it. On par with my old, film-era Leica or Nikkor lenses. Closest to the camera, you will find the focus-ring.Nice resistance and adequate throw, no problems there. At 12mm there is so much depth-of-field at any aperture, that getting critical focus is very easy. Next, you will find the zoom-ring. Also nice resistance and good throw. Closest to the front-element is the aperture-ring. It has a bit too much resistance for my taste, and the full-stop clicks are not very well defined. I often feel the need to visually double-check what aperture I am at when working it in the field. The lens comes with a tiny hood that serves as an adapter for 77mm screw-on filters. I mounted it the day I got it and haven’t taken it off. The lens is not weather-sealed.
| Full frame equivalent focal length | 12-24mm with 3:2 full-frame crop. In 65:24 x-pan crop it is as wide as a 9.5mm in full-frame terms (horizontally). |
| Aperture | f5.6-22 |
| Length (lens only) | 90mm (Leica M-version) |
| Length (with adapter) | 98mm |
| Weight (lens only) | 497g |
| Weight (with adapter) | 543g |
| Filter Ø | 77mm with the included holder |
| Close focus | 15cm |
| Hood | Bayonet, doubles as 77mm filter holder |
| Adapter used | TT artisan Leica M to Hasselblad X |
Test shot
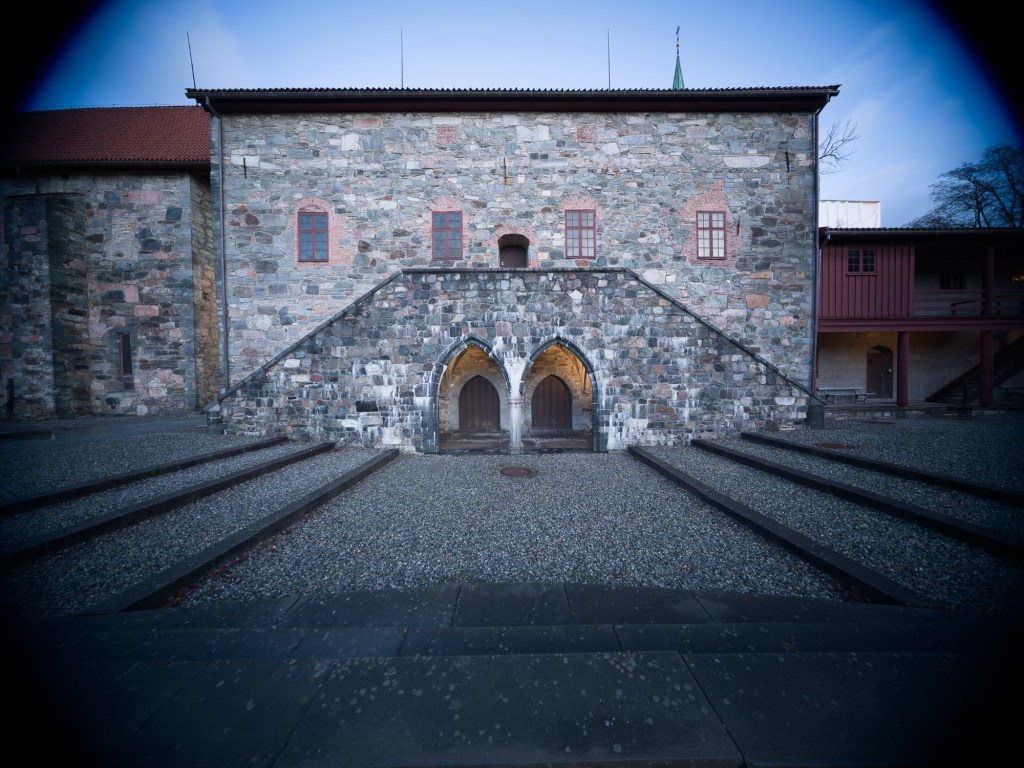
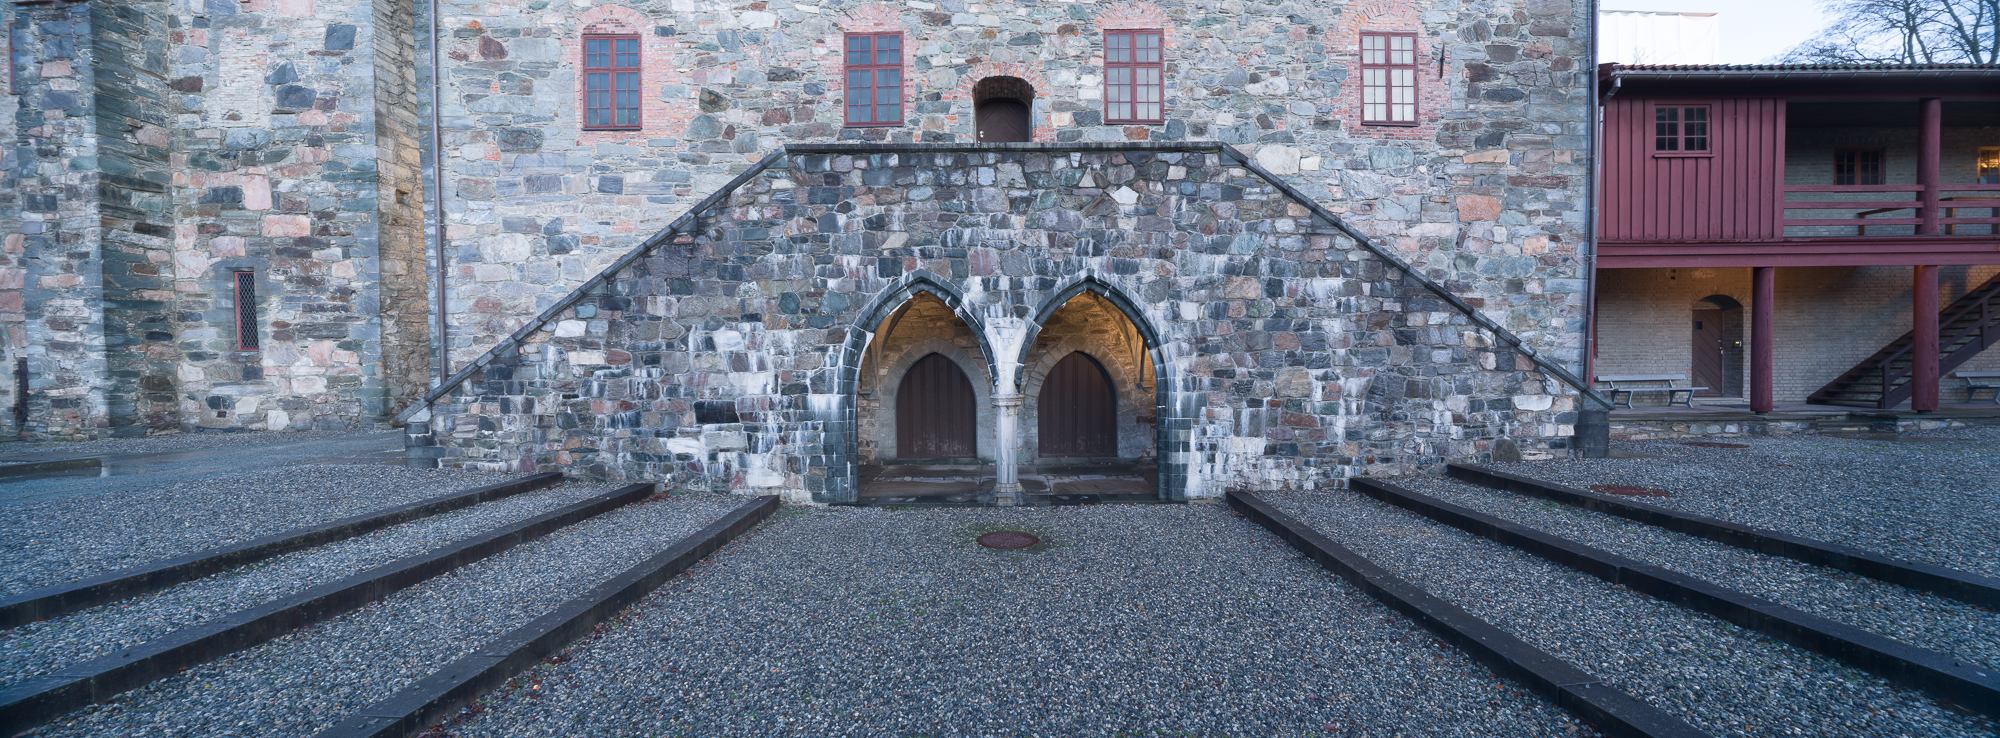
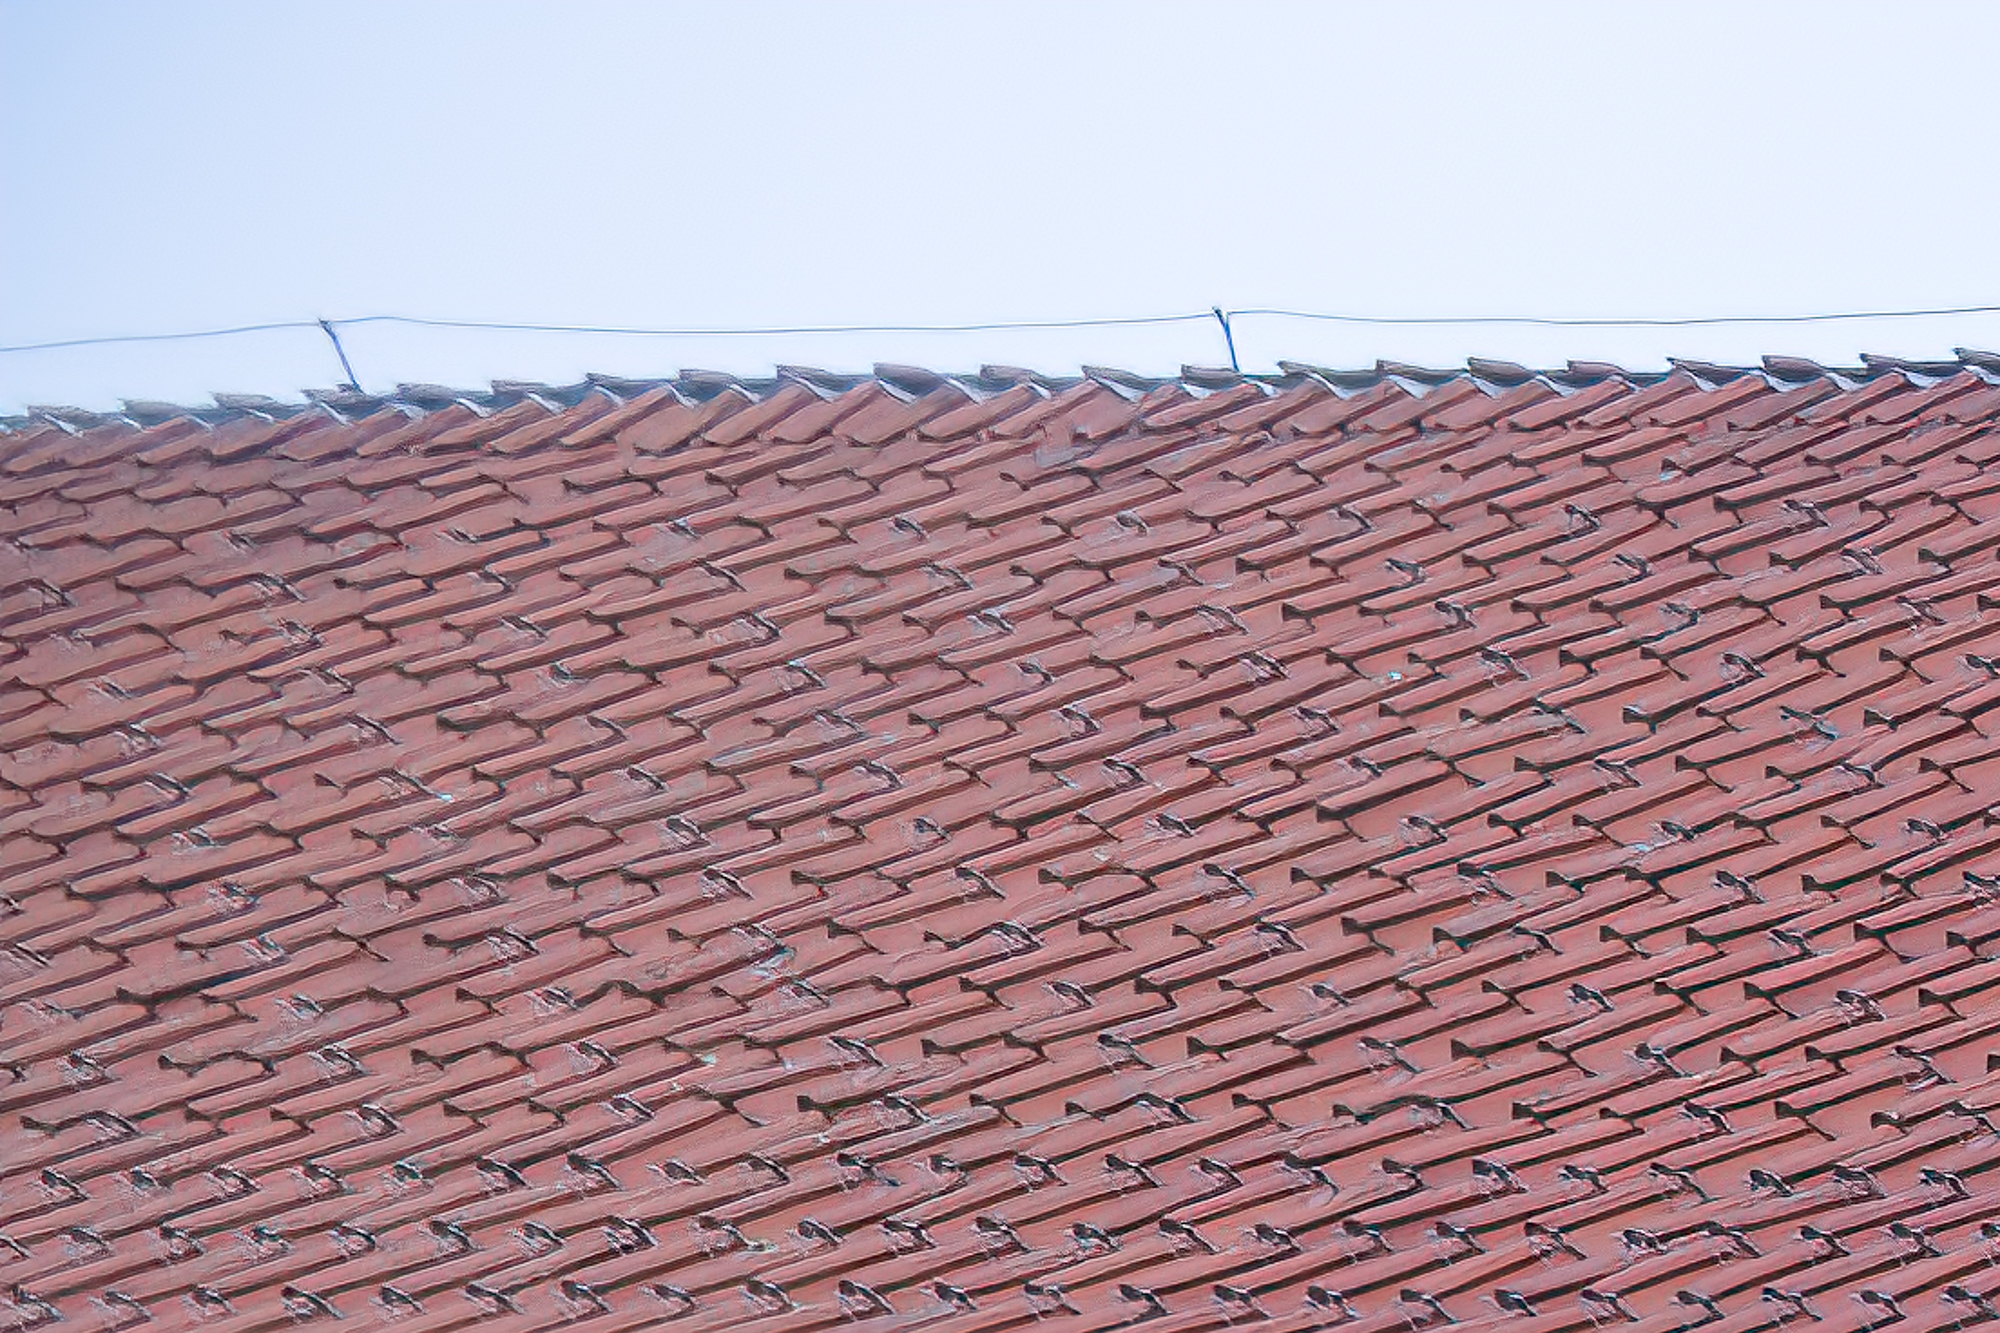
As usual with my test-shots, the artistic value is not important. I just took a few images representative for how I would use this lens in real life. As straight lines are paramount in any image involving buildings, stitching a pano here would require a lot of work in post. So, architecture is one mode where I see the use for an ultrawide lens. The high contrast and details in the building makes this scene suitable for evaluating the technical properties of the lens. All images were taken with the Hasselblad X2D mounted on a tripod, electronic shutter, 2 sec timer. Manual focus on the building straight ahead in 100%. All images captured at f11. I chose f11 for reasons not shown in this post. I evaluated center, edge and corner sharpness on all apertures from f5.6 to f22. Center sharpness peaked at f8 and border sharpness at f16. However, the best all-over sharpness was found at f11. There was minimal improvement in vignetting from f5.6 to f22, and again, I landed on the compromise of f11. As mentioned above, depth-of-field is so huge at 12mm, that you really don’t need to think much about the relationship between aperture and depth-of-field, at least not for subjects a few meters from the lens.
As for postprocessing, not much is done on these test shots. Upon import to Lightroom I have used my standard import-settings with Raw-sharpening/deconvolution (amount 30, radius 0.5, details 100). All other corrections are given in the caption of the images as different properties are discussed.
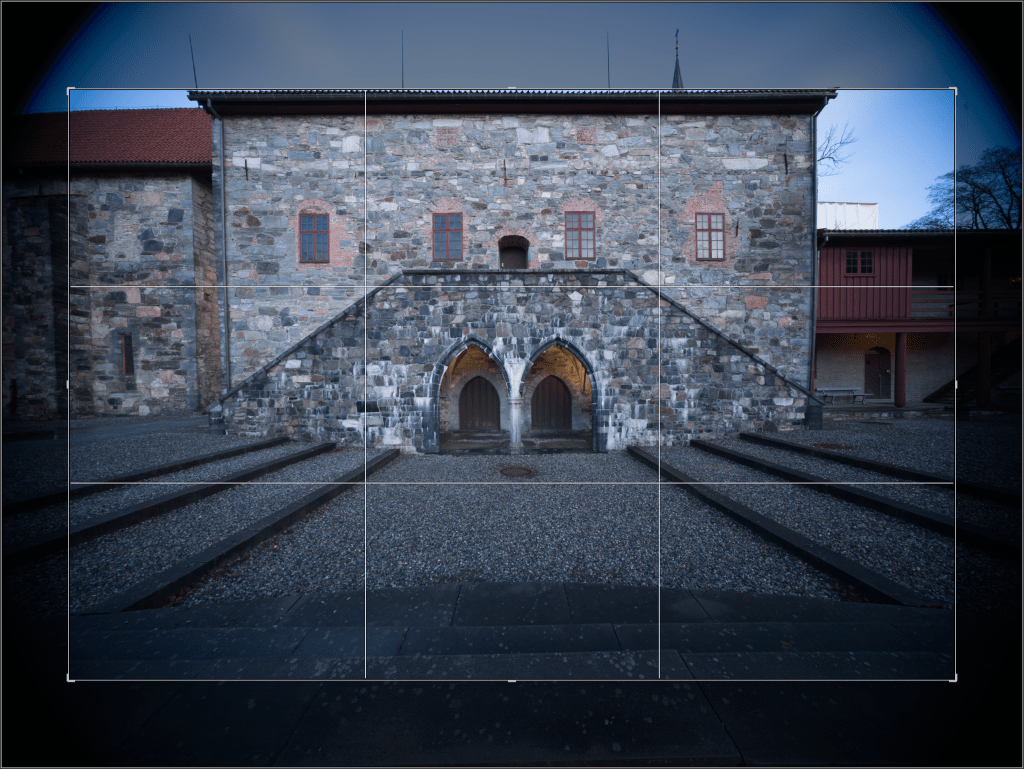
Hard vignetting and Recommended crops
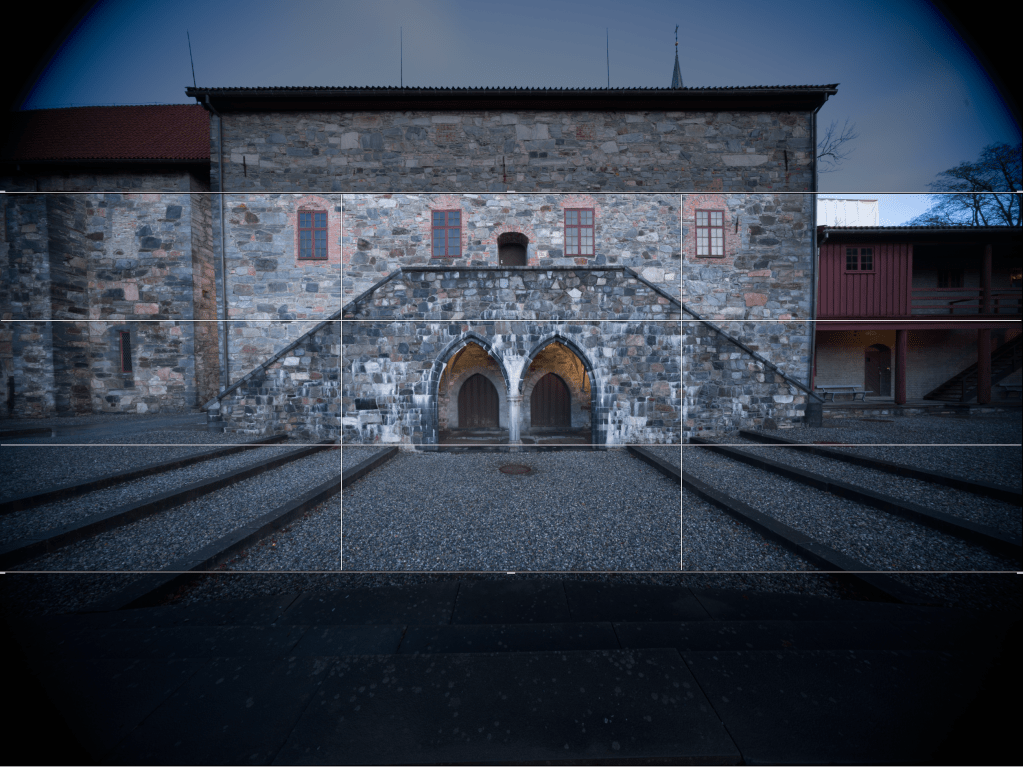
Obviously there’s a hard vignette. This disappears as you zoom in, but I haven’t made any proper tests on longer focal-lengths by now, so I cannot comment any further on that, yet. As this lens was made for full-frame cameras, I simply recommend using it with the Hasselblad’s 3:2 crop (24:36) crop-mode and don’t think any more about it. There is one exception though. As i primarily wanted to use this lens for panoramas, I have tested it with the 65:24 x-pan crop at 12mm too. There is no hard vignetting in that crop. Part of the image, the extreme edges, will be outside of the image circle intended to be used. As we shall see later, it may still be ok to use this crop in full width of the sensor. Horizontally, it then corresponds to a focal length of 9.5mm lens on a full-frame sensor!
I am not worried by these crops. You loose a few pixels, but you will still have Hasselblad’s wonderful colors and in-pixel quality. The 3:2 full frame crop gives you a 68.3 megapixel file. The x-pan 65:24 crop results in a 50.1 megapixel file. More than enough for most of my images.
Soft Vignetting (cropped)
As can be seen on the images above, even after 3:2 FF crop and at f11, there is an obvious soft vignette. A well known issue with ultrawides. It has a slight drop when stopping down, but only minimal. As mentioned, these images were taken at f11.Not only are corners substantially darker than the center, but they also have a strong blue cast. I like a slight vignette in some of my images, but not like this!
The soft vignette can mostly be corrected though. I took a photo of a plain white wall, loaded it to Lightroom and adjusted the color temperature for pure white in the center of the image. Then I corrected the dark, blue corners with linear filters (exposure and color-temp/tint) until i had an even, white frame. If this is difficult, it might help to set contrast, saturation and vibrance to 100 on the whole image when placing the filters, and then pull back afterwards. I then saved the settings as a preset in Lightroom. Easy one-click correction for all images taken with this lens from here. It works mostly quite well, but I find that on some images I have to make small, tailored adjustments in addition.


Distortion


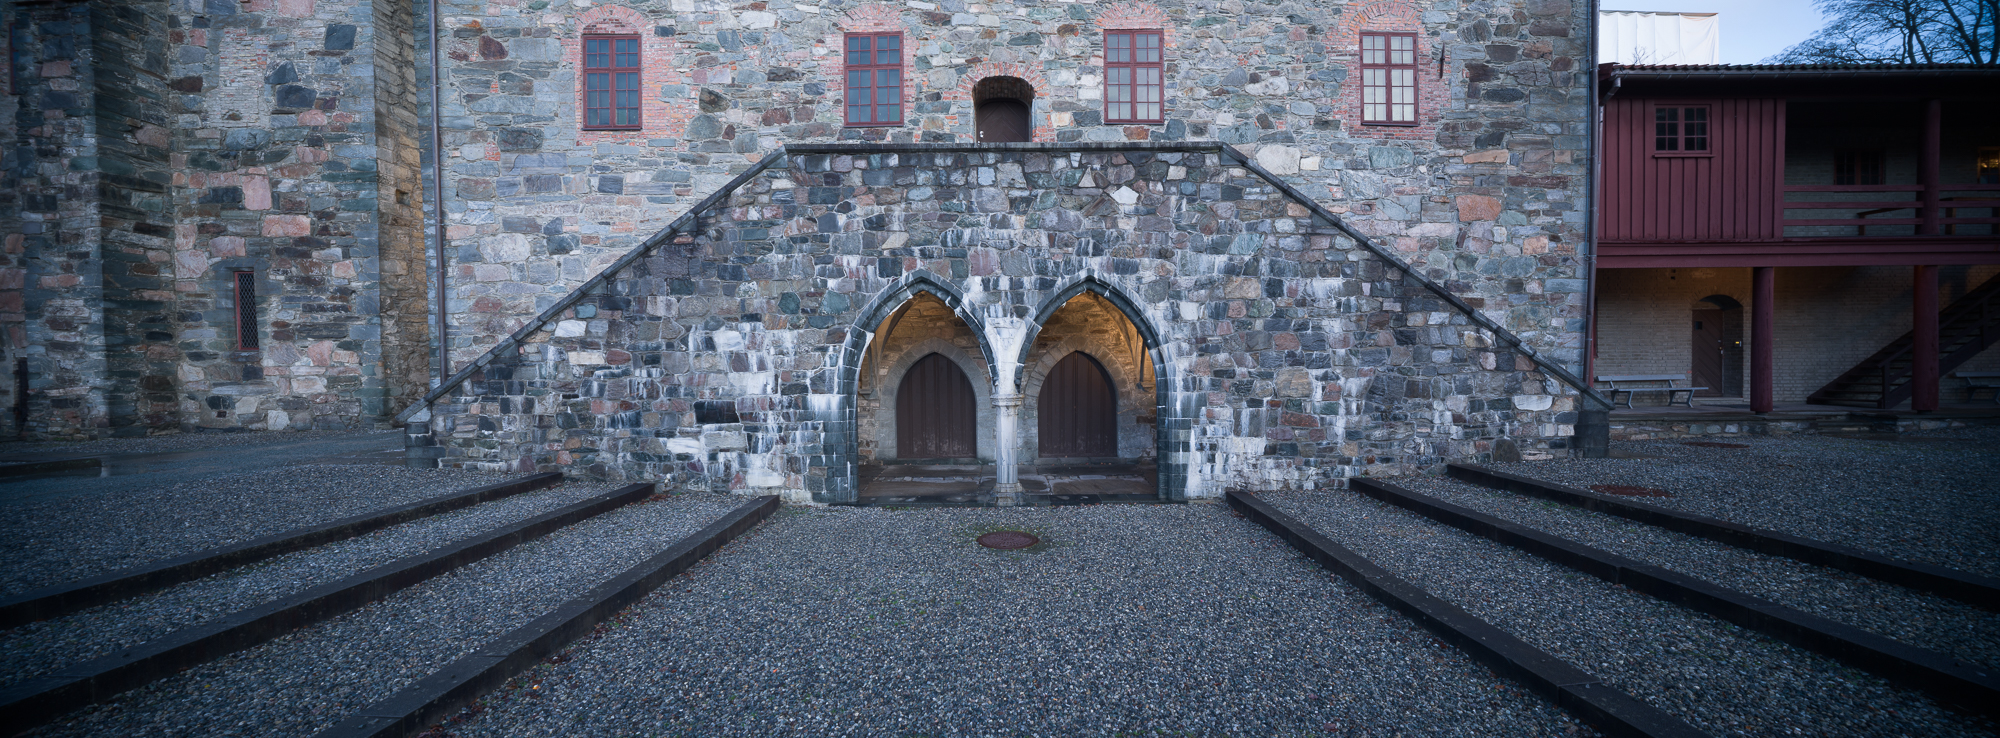
At 12mm there is a slight barrel-distortion. It seems quite uniform at this focal length so it it easily corrected. I found that only +3 on manual distortion in Lightroom will suffice. I have incorporated that in my preset for this lens at 12mm, and the full preset has been applied on the image above (both distortion and vignetting).
Sharpness
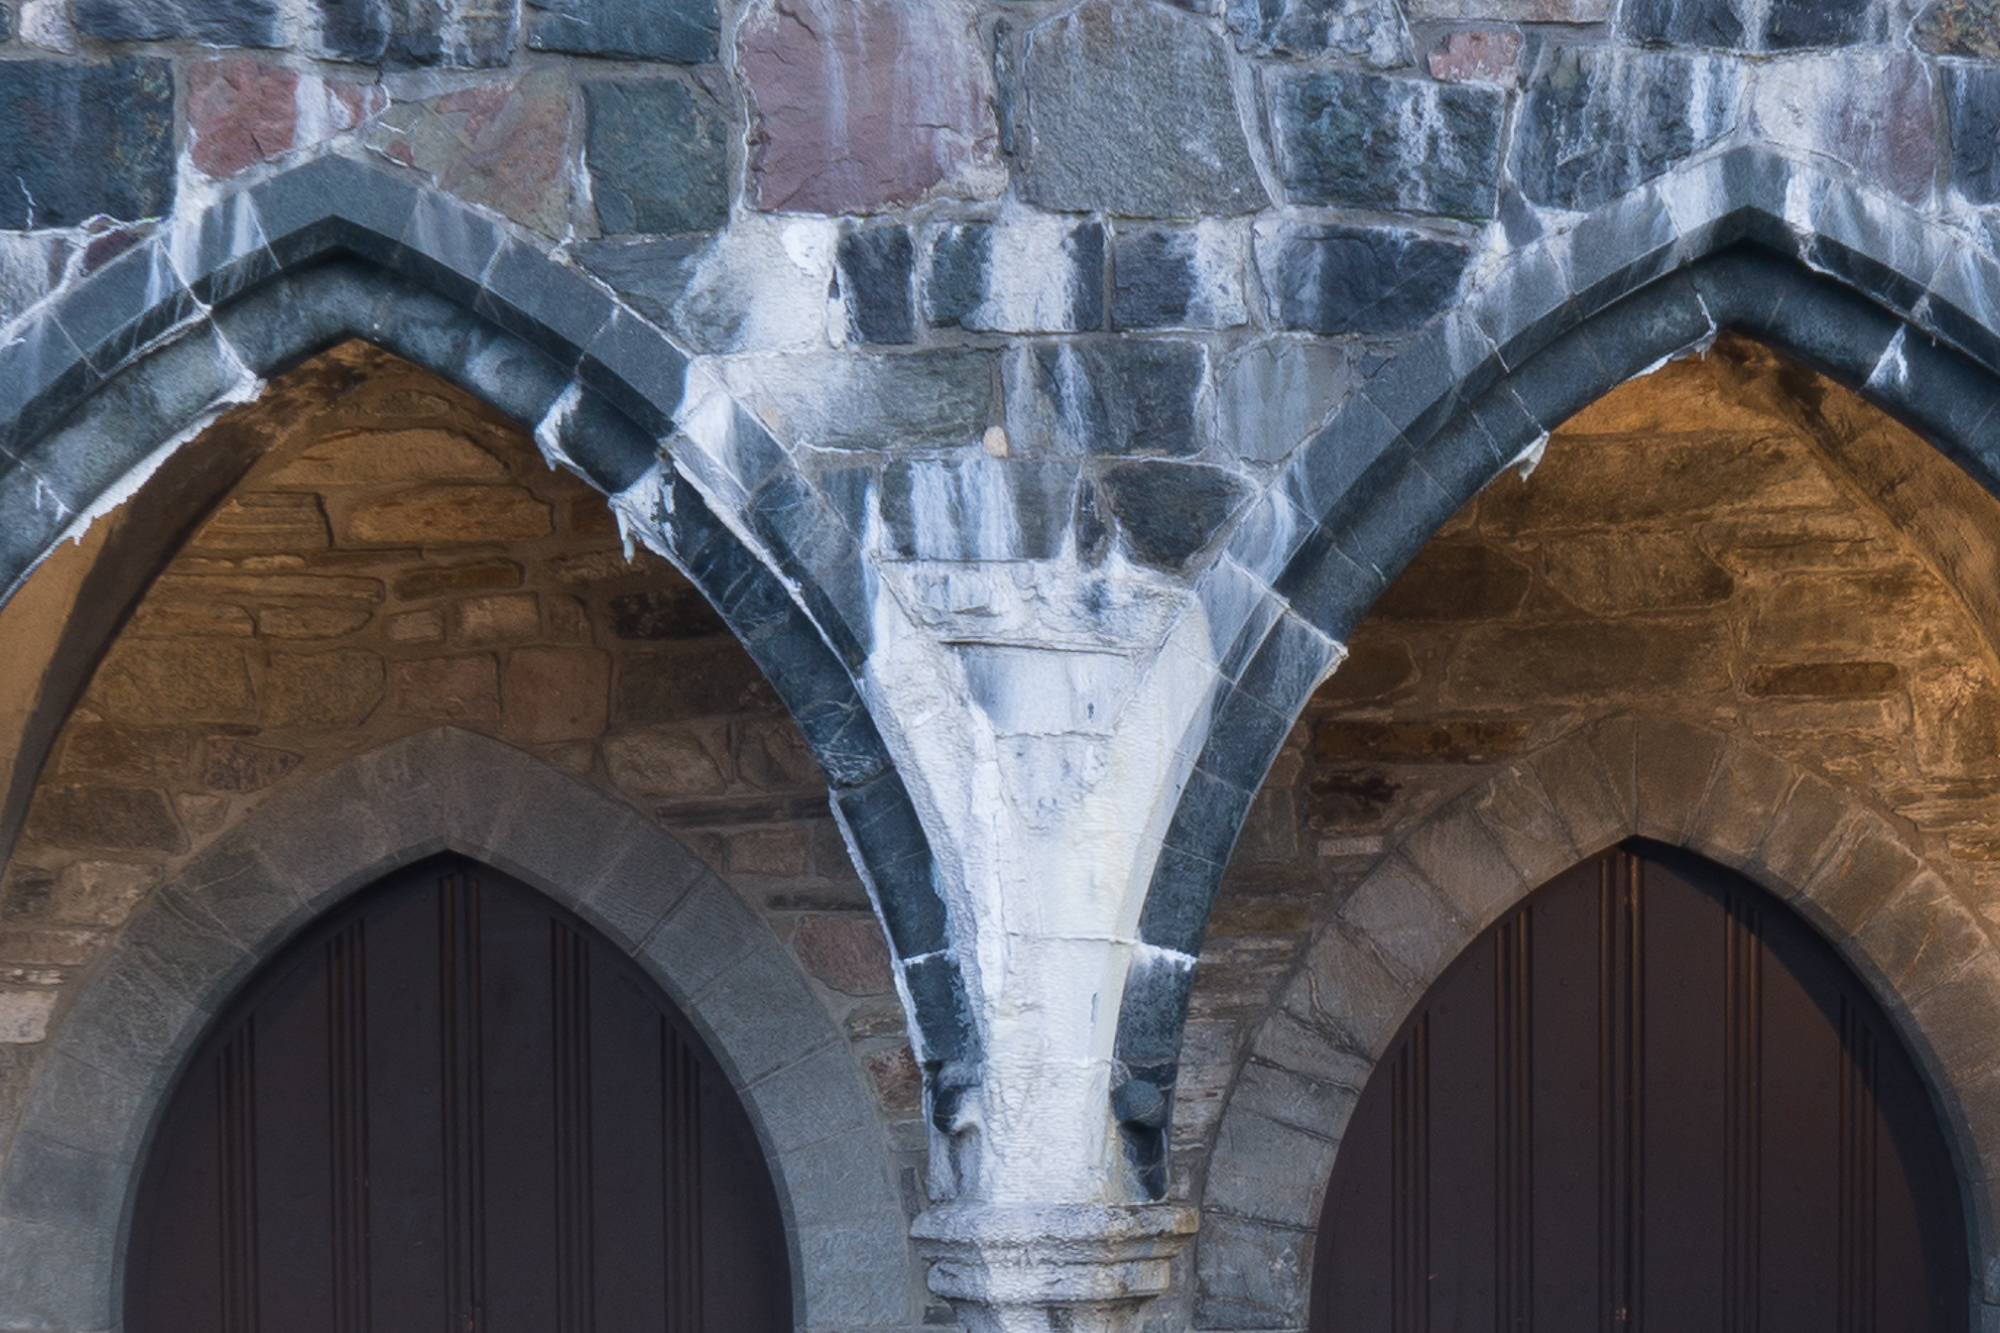
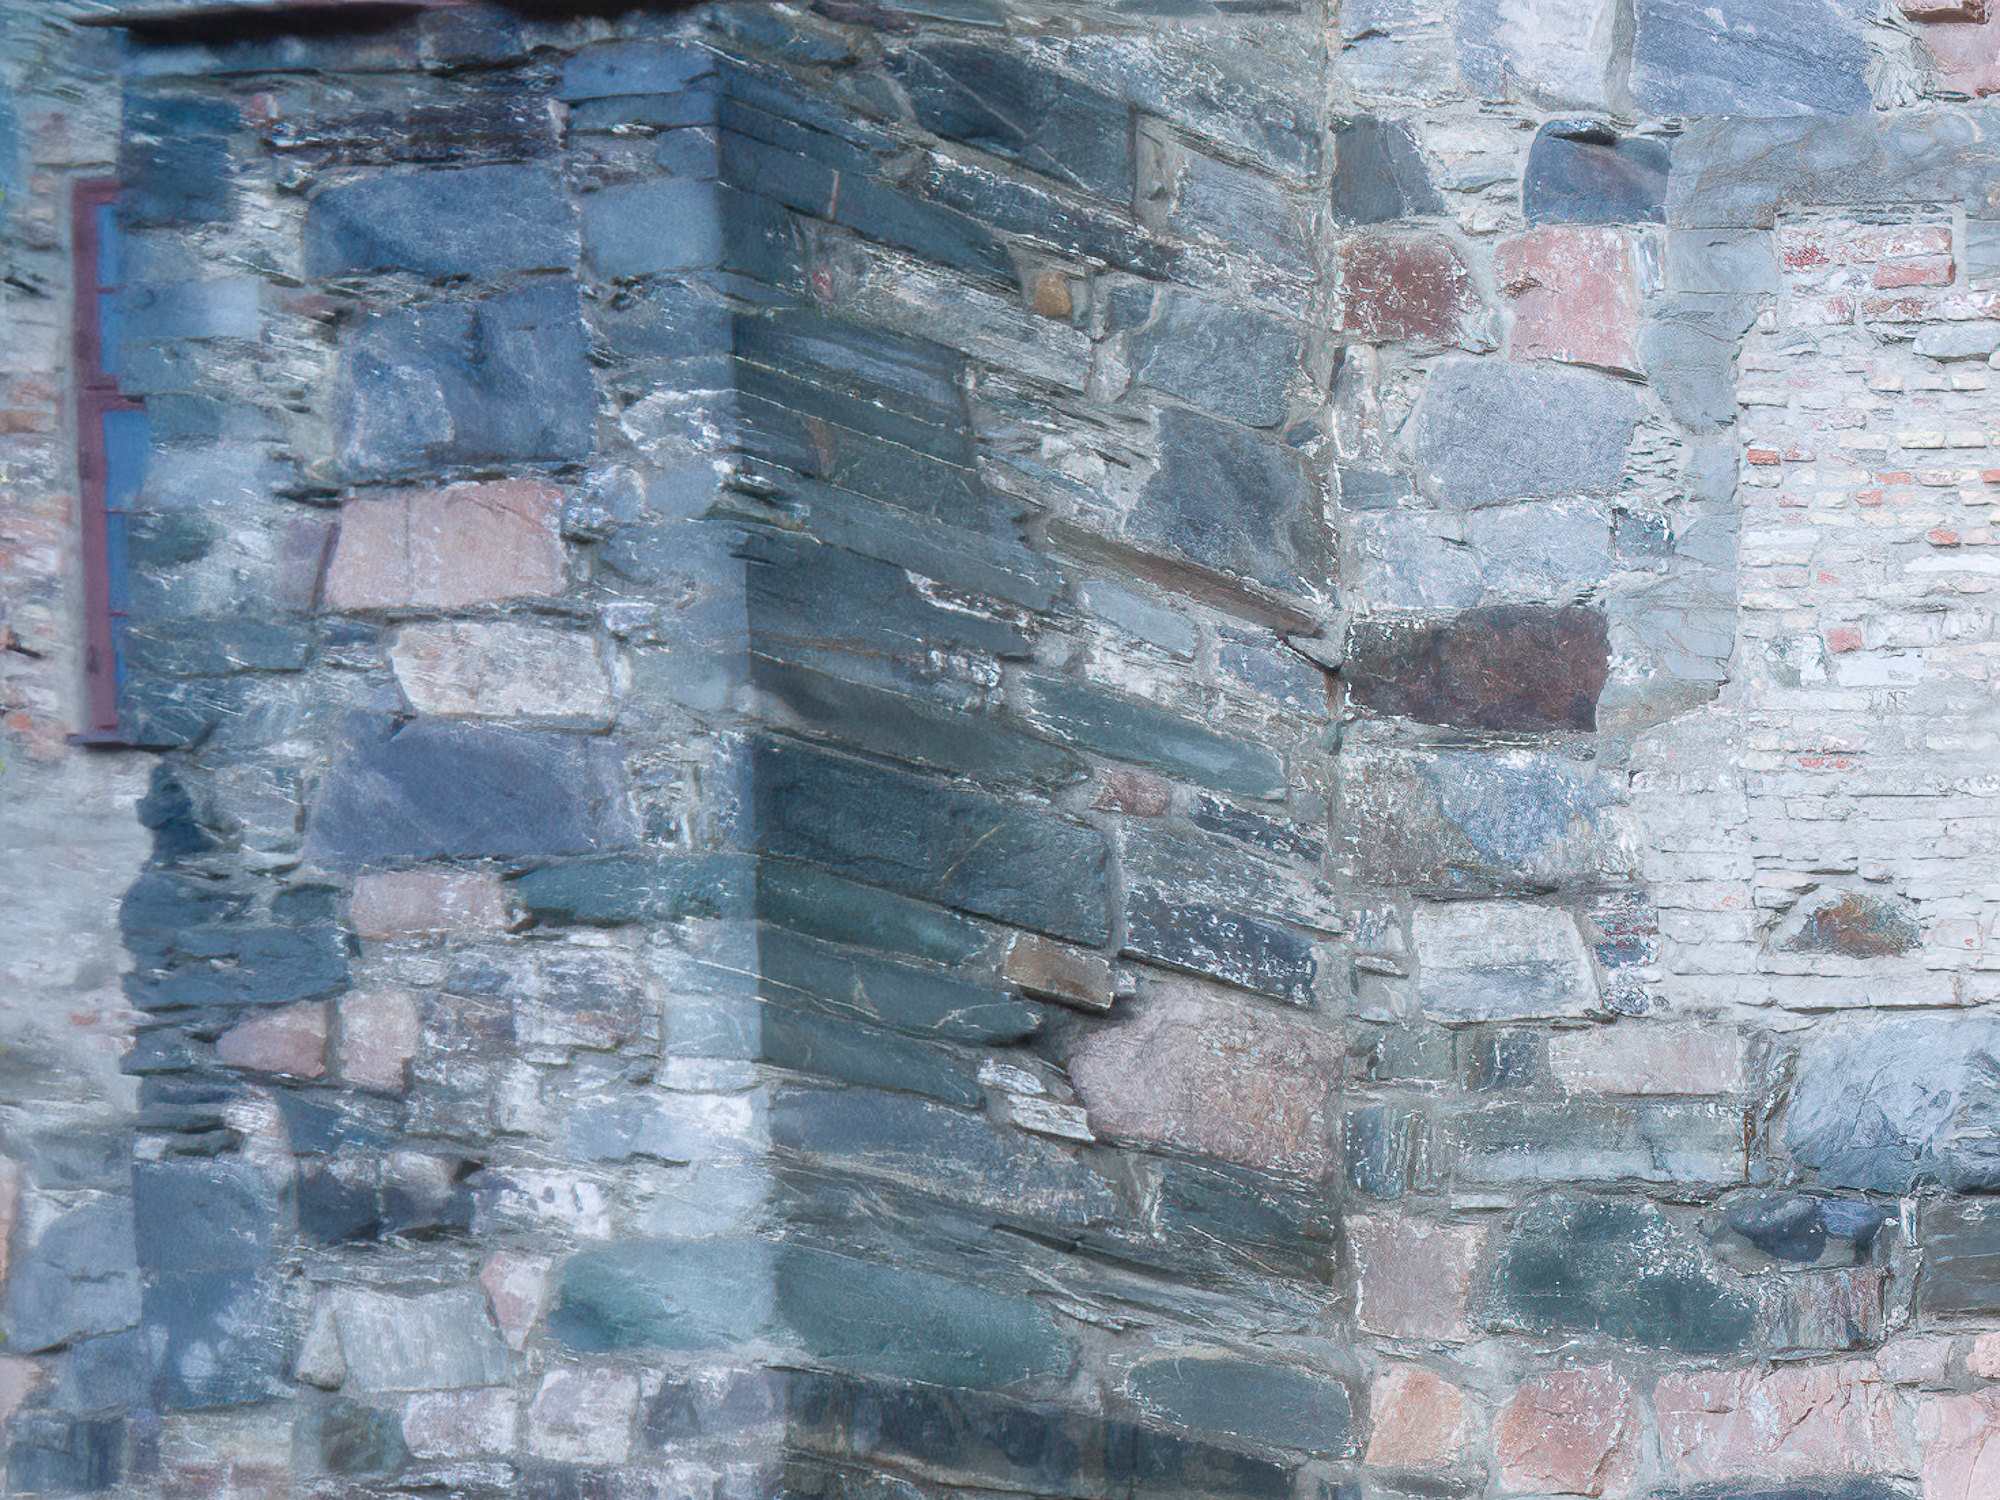
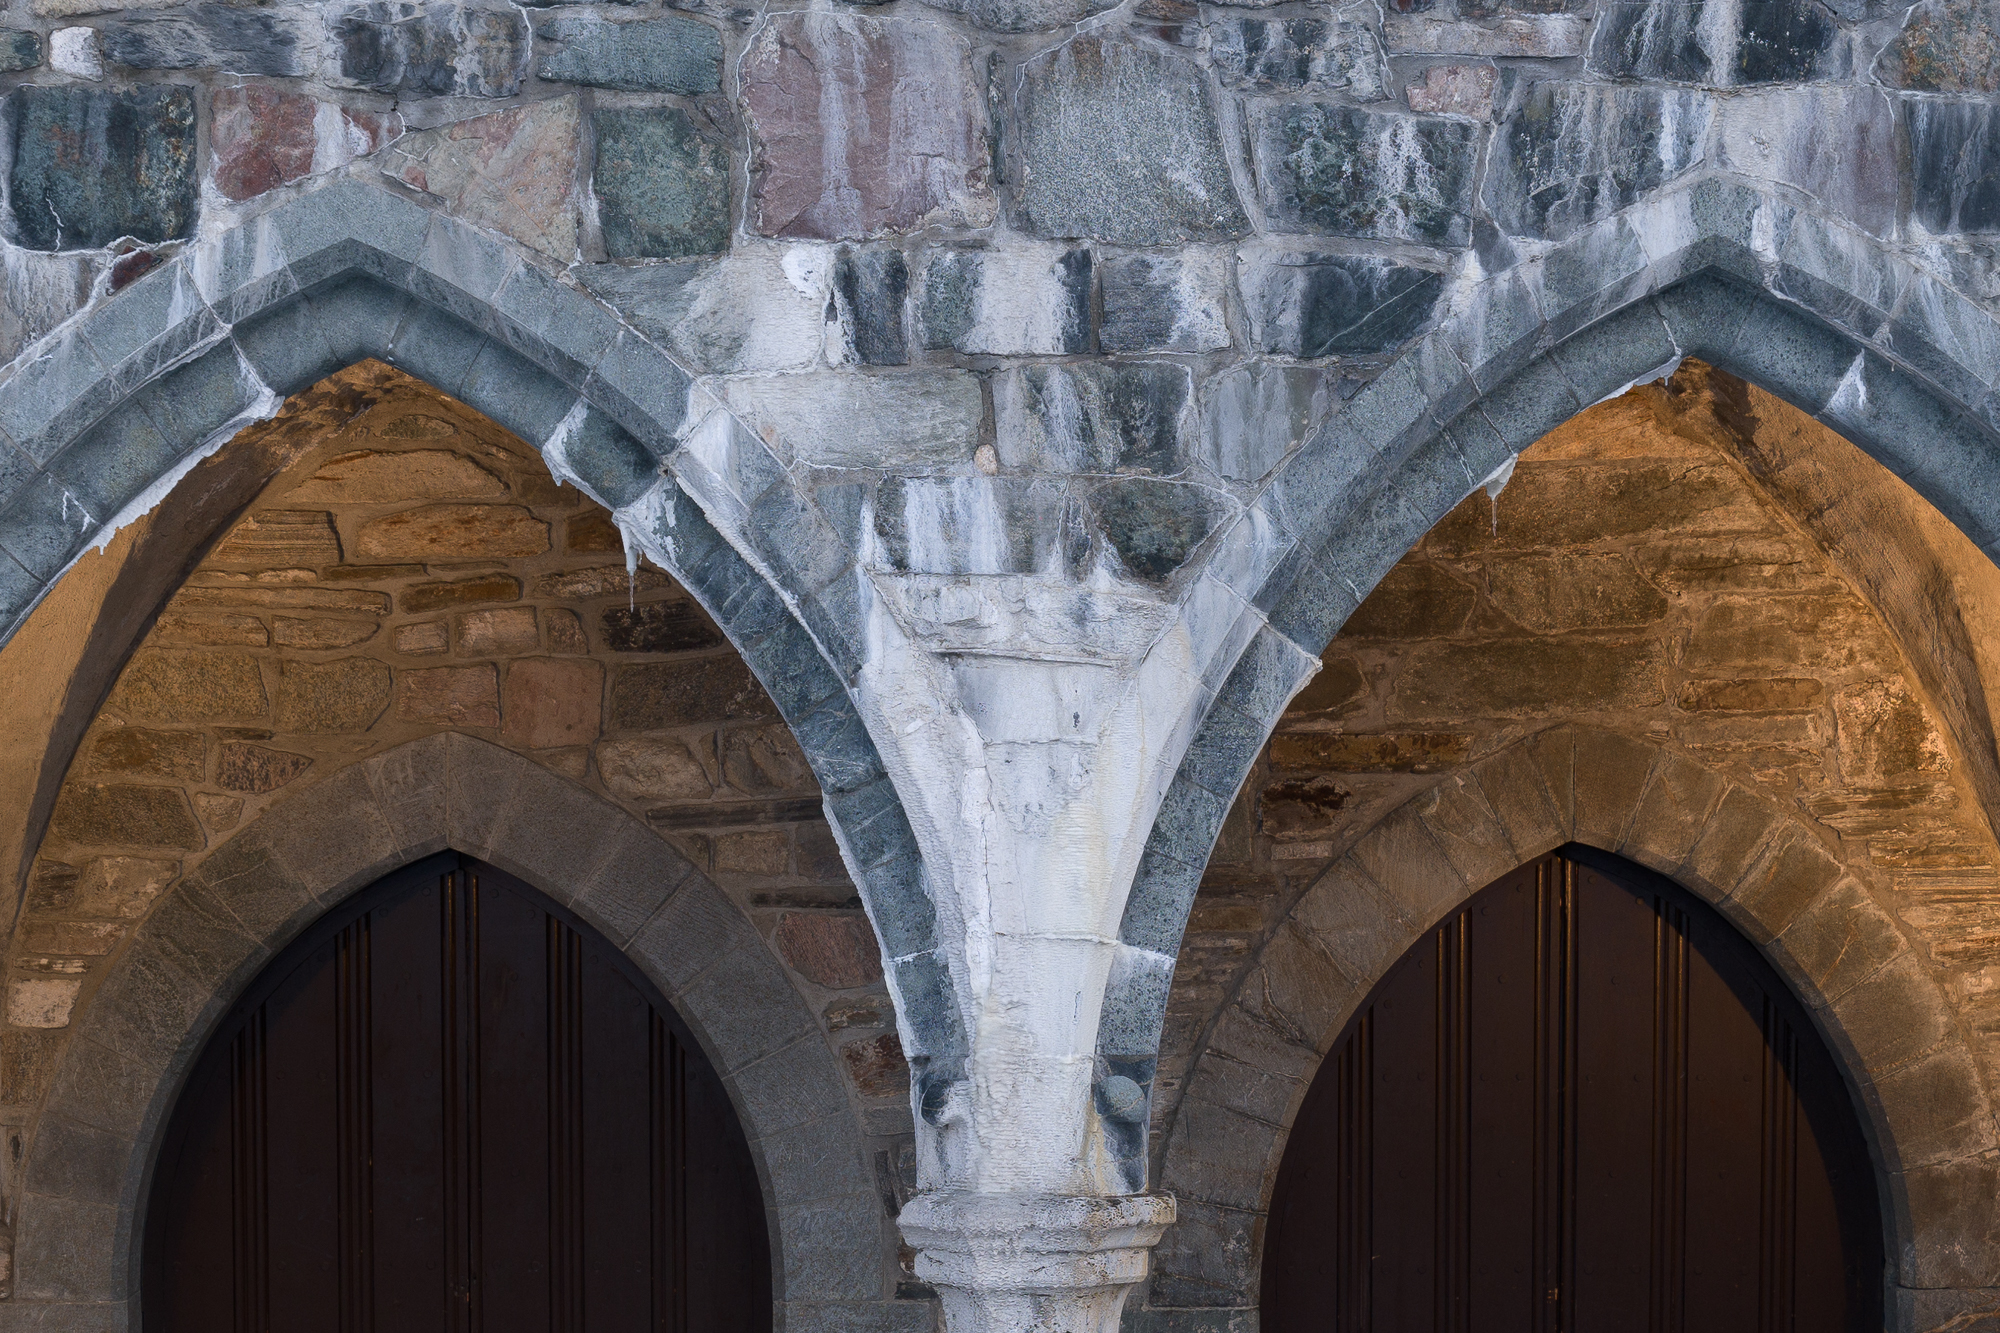
Now to the fun part! Obviously, I have studied the whole frame meticulously, but here I will present three selected areas enlarged. They are representative, i.e, all sides and corners display the same sharpness as the examples, so there are no signs of mal-alignment or similar problems (e.g. mounting issues with the adapter!) The three areas shown are 200% crops of center, border and extreme corner at f11. Manual focus on the center of the image. Tripod and 2 sec timer. First, the 24×36 full-frame crop:
Of course, I have no other lens this wide that I can compare with. That was the very point of getting this lens. If I had a high-end medium format lens giving me a 12mm equivalent angle of view, I would have gotten it, but no such lens exist. Compromises must be made. But just for the fun of it, I have compared the center portion of the image with a somewhat similar crop taken with the xcd 21mm at the end of this post.
Most modern lenses are to some degree dependent on software correction. The Hasselblad xcd-lenses (and the hcd!) are no exception. Both for correction of vignette and distortion. As you may have seen in many of my previous lens-tests, I have no problem with using software also for correcting for optical flaws impairing sharpness. I often use Topaz sharpen AI to improve sharpness in the corners when using third party optics, such as tilt-shift lenses. In this review I have included assessment of sharpness with and without using Topaz sharpen AI. I mostly use the “sharpen” or “focus” mode, but sometimes, “stabilize” is the right one. Here, I have used “sharpen”, and I present before- or after results.
Raw-file imported to Lightroom has undergone initial sharpening (deconvolution): Amount 30, radius 0.5, details 100. No other adjustments for initial evaluation.


What about the 65:24 x-pan crop then? Well, at least the extreme corners are avoided, but the extreme edge in this crop will be outside of the intended full-frame 24×36 image circle. Let’s see!
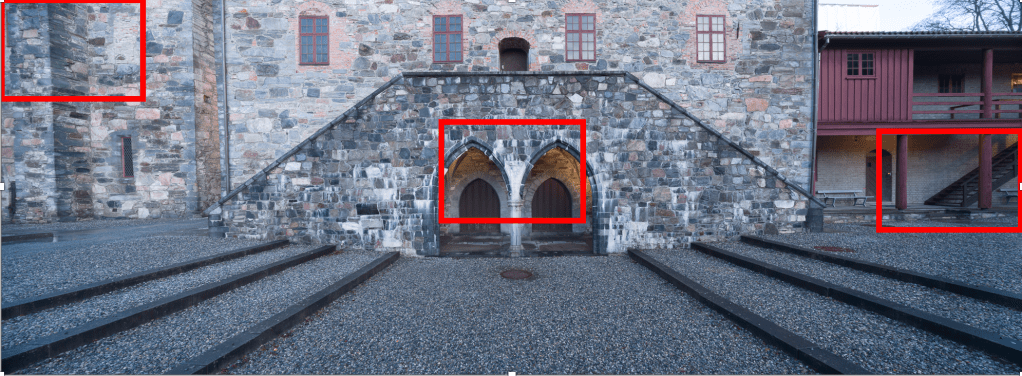
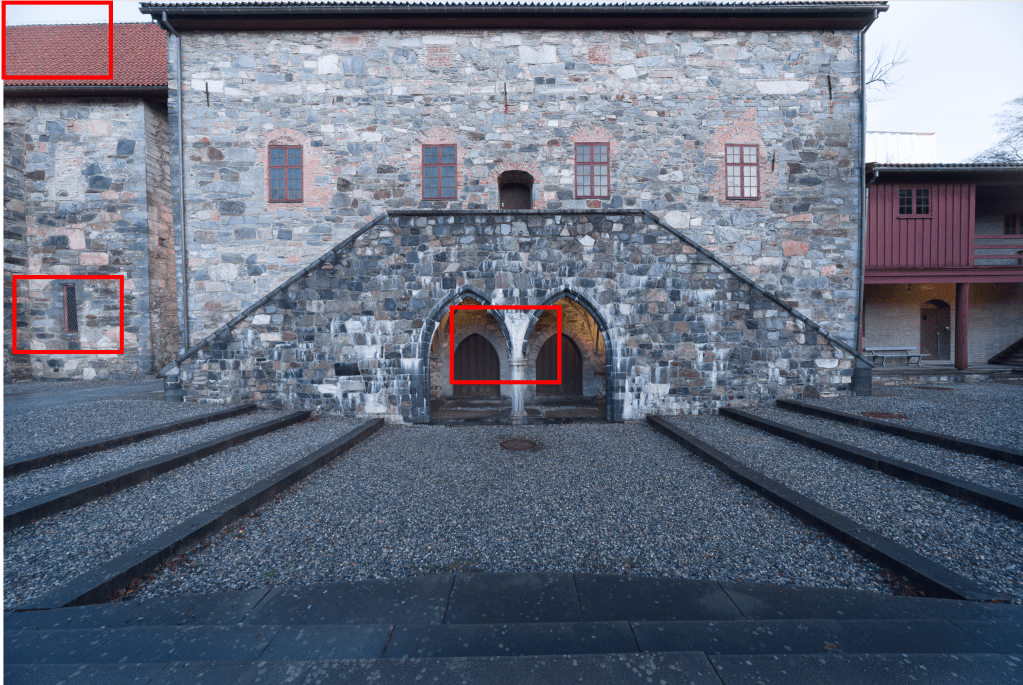
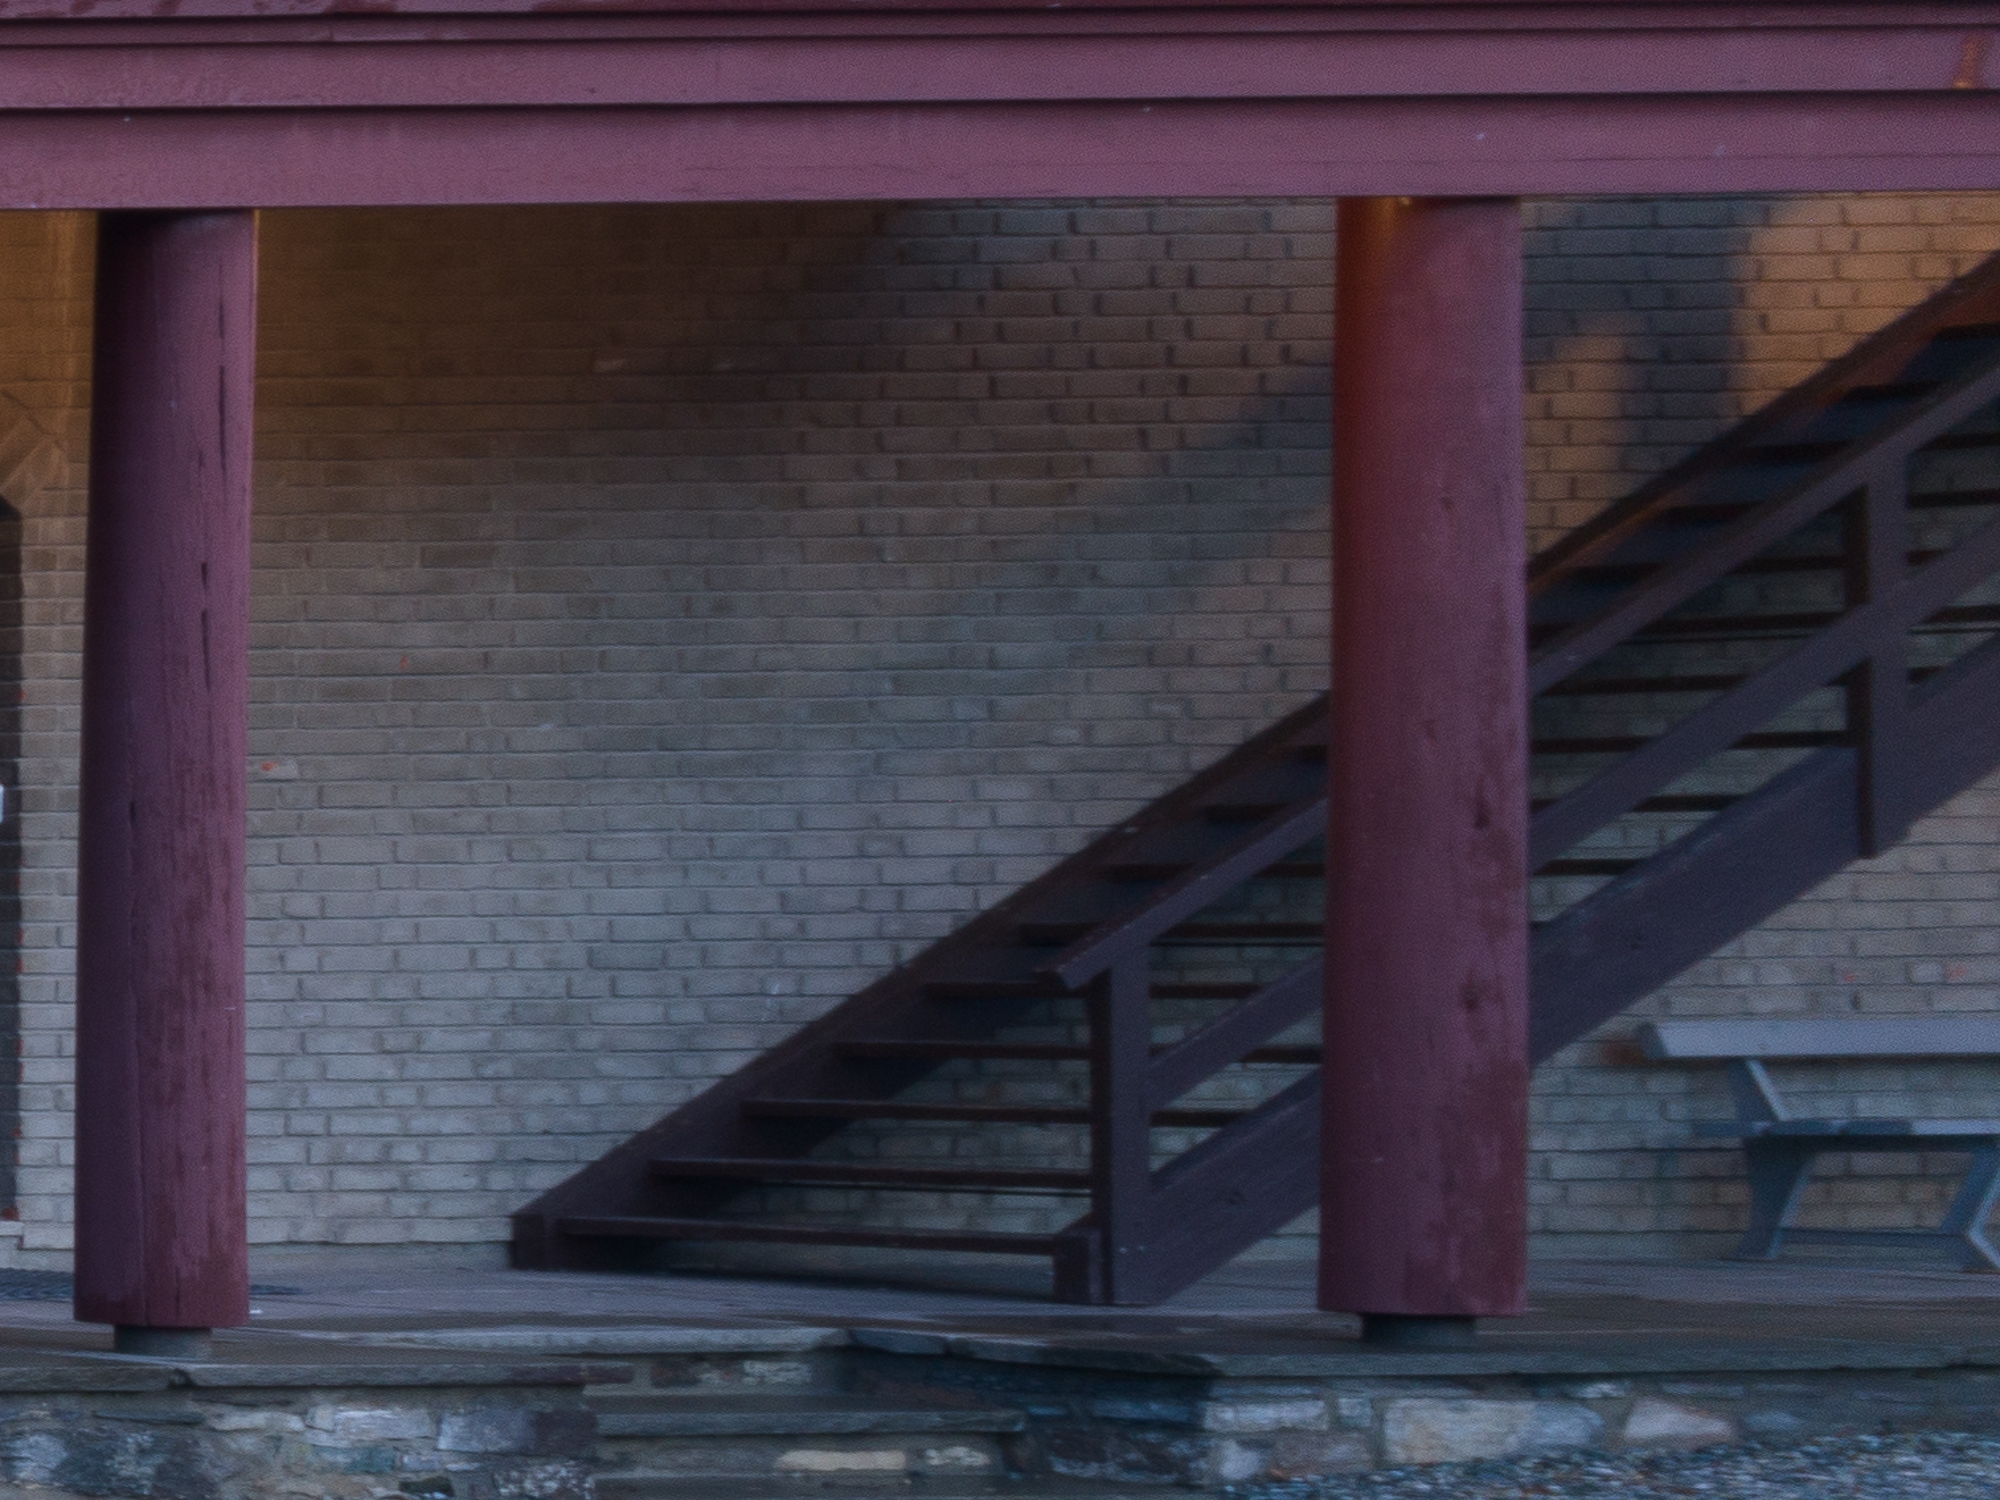
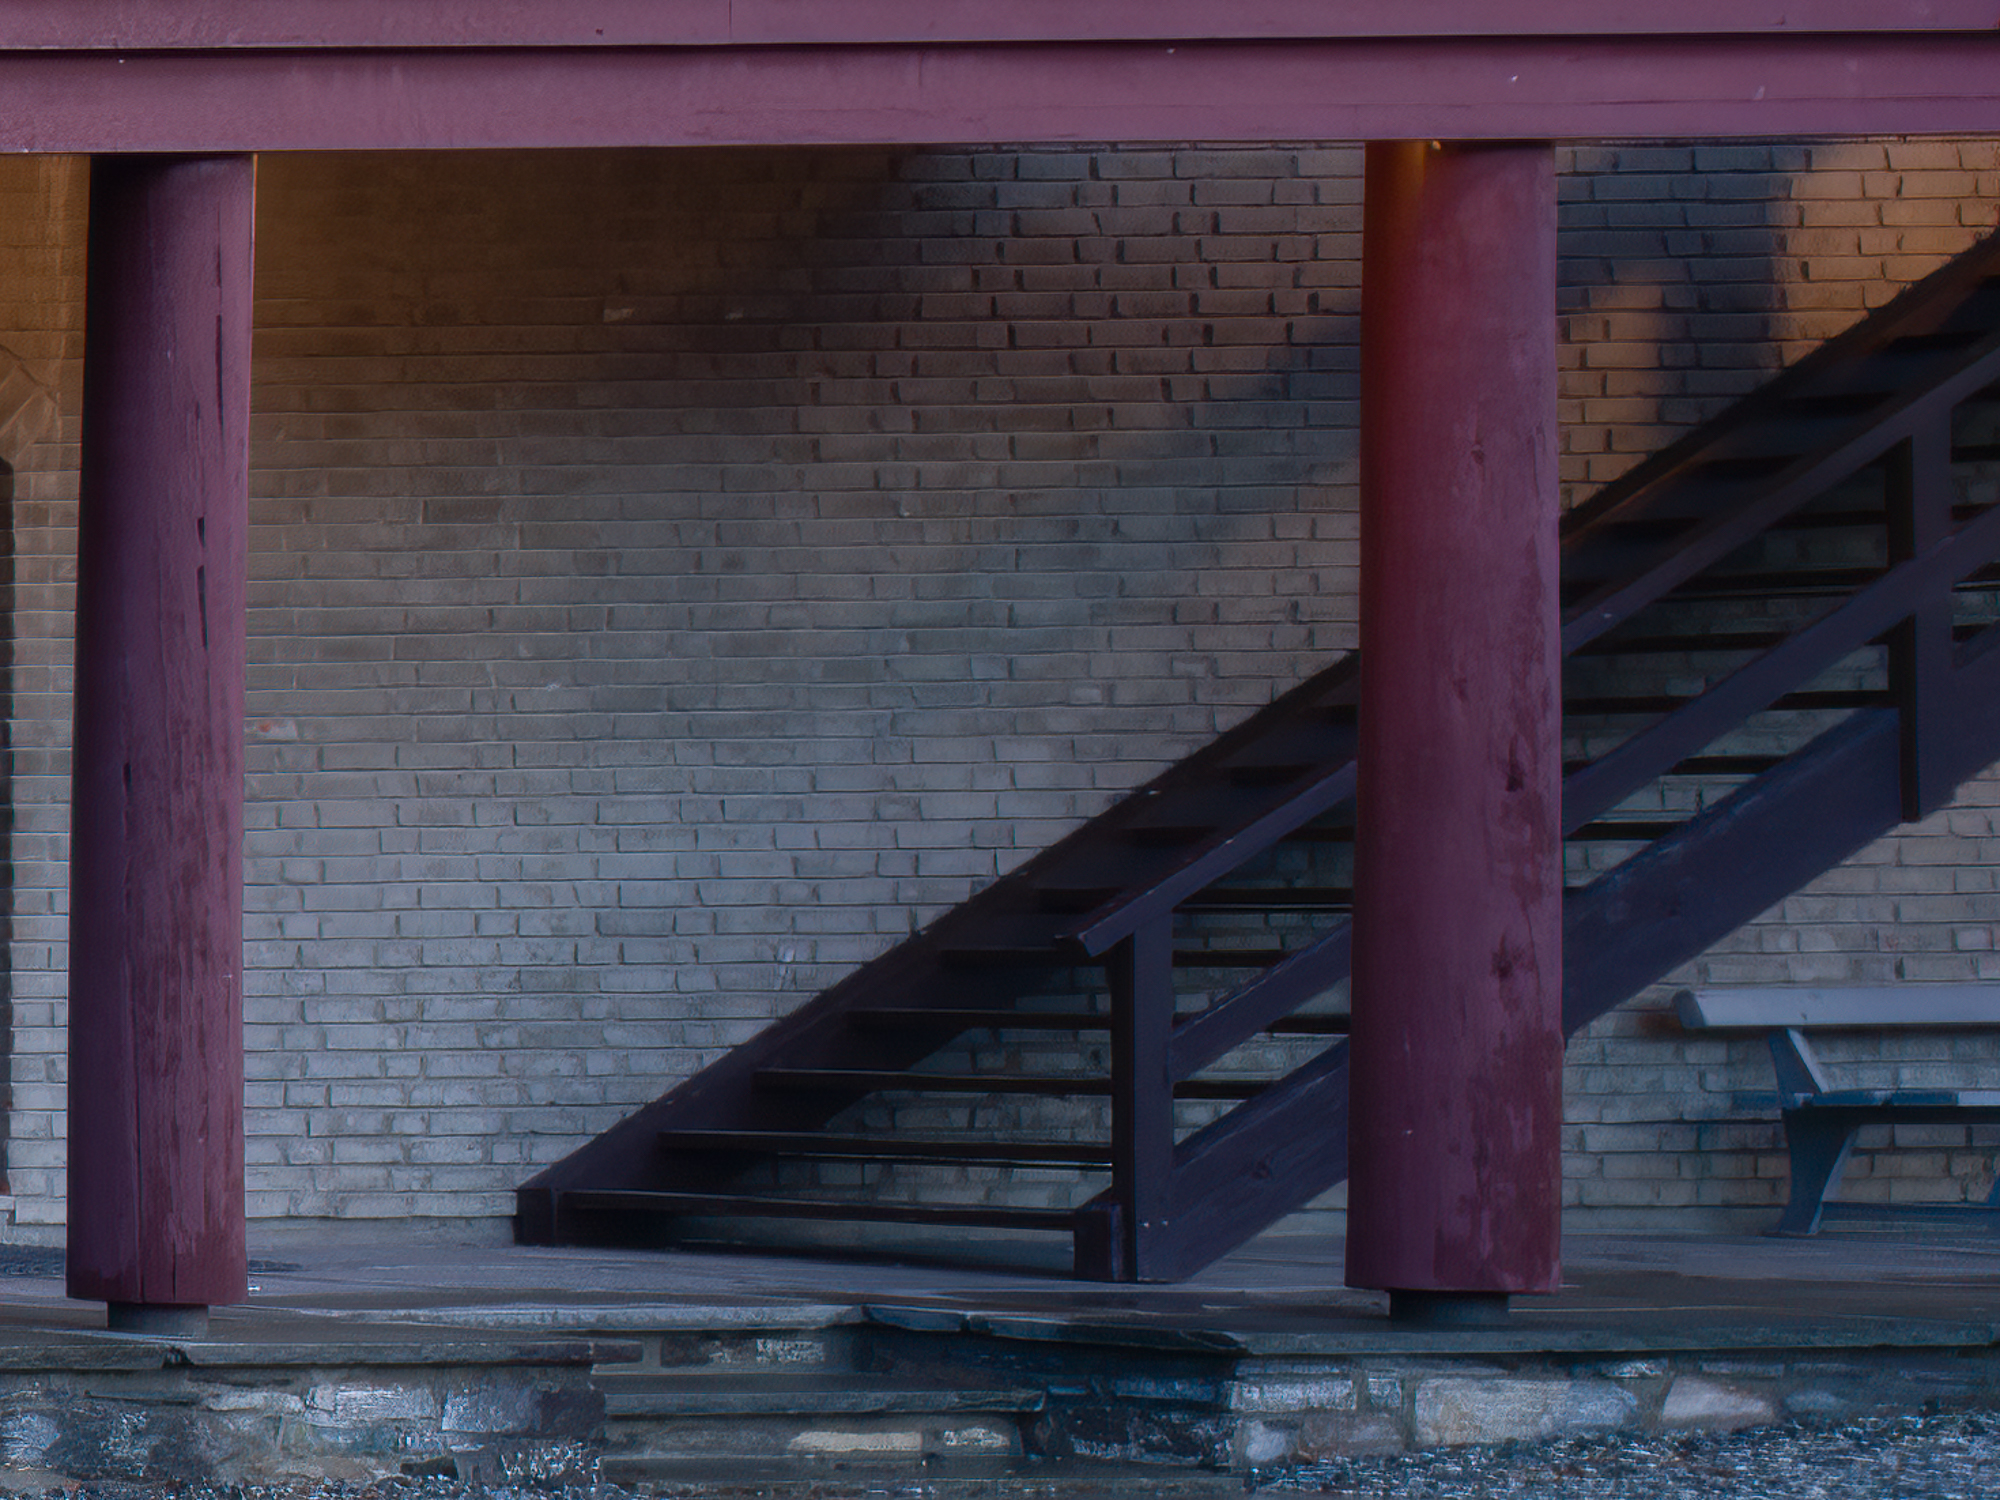
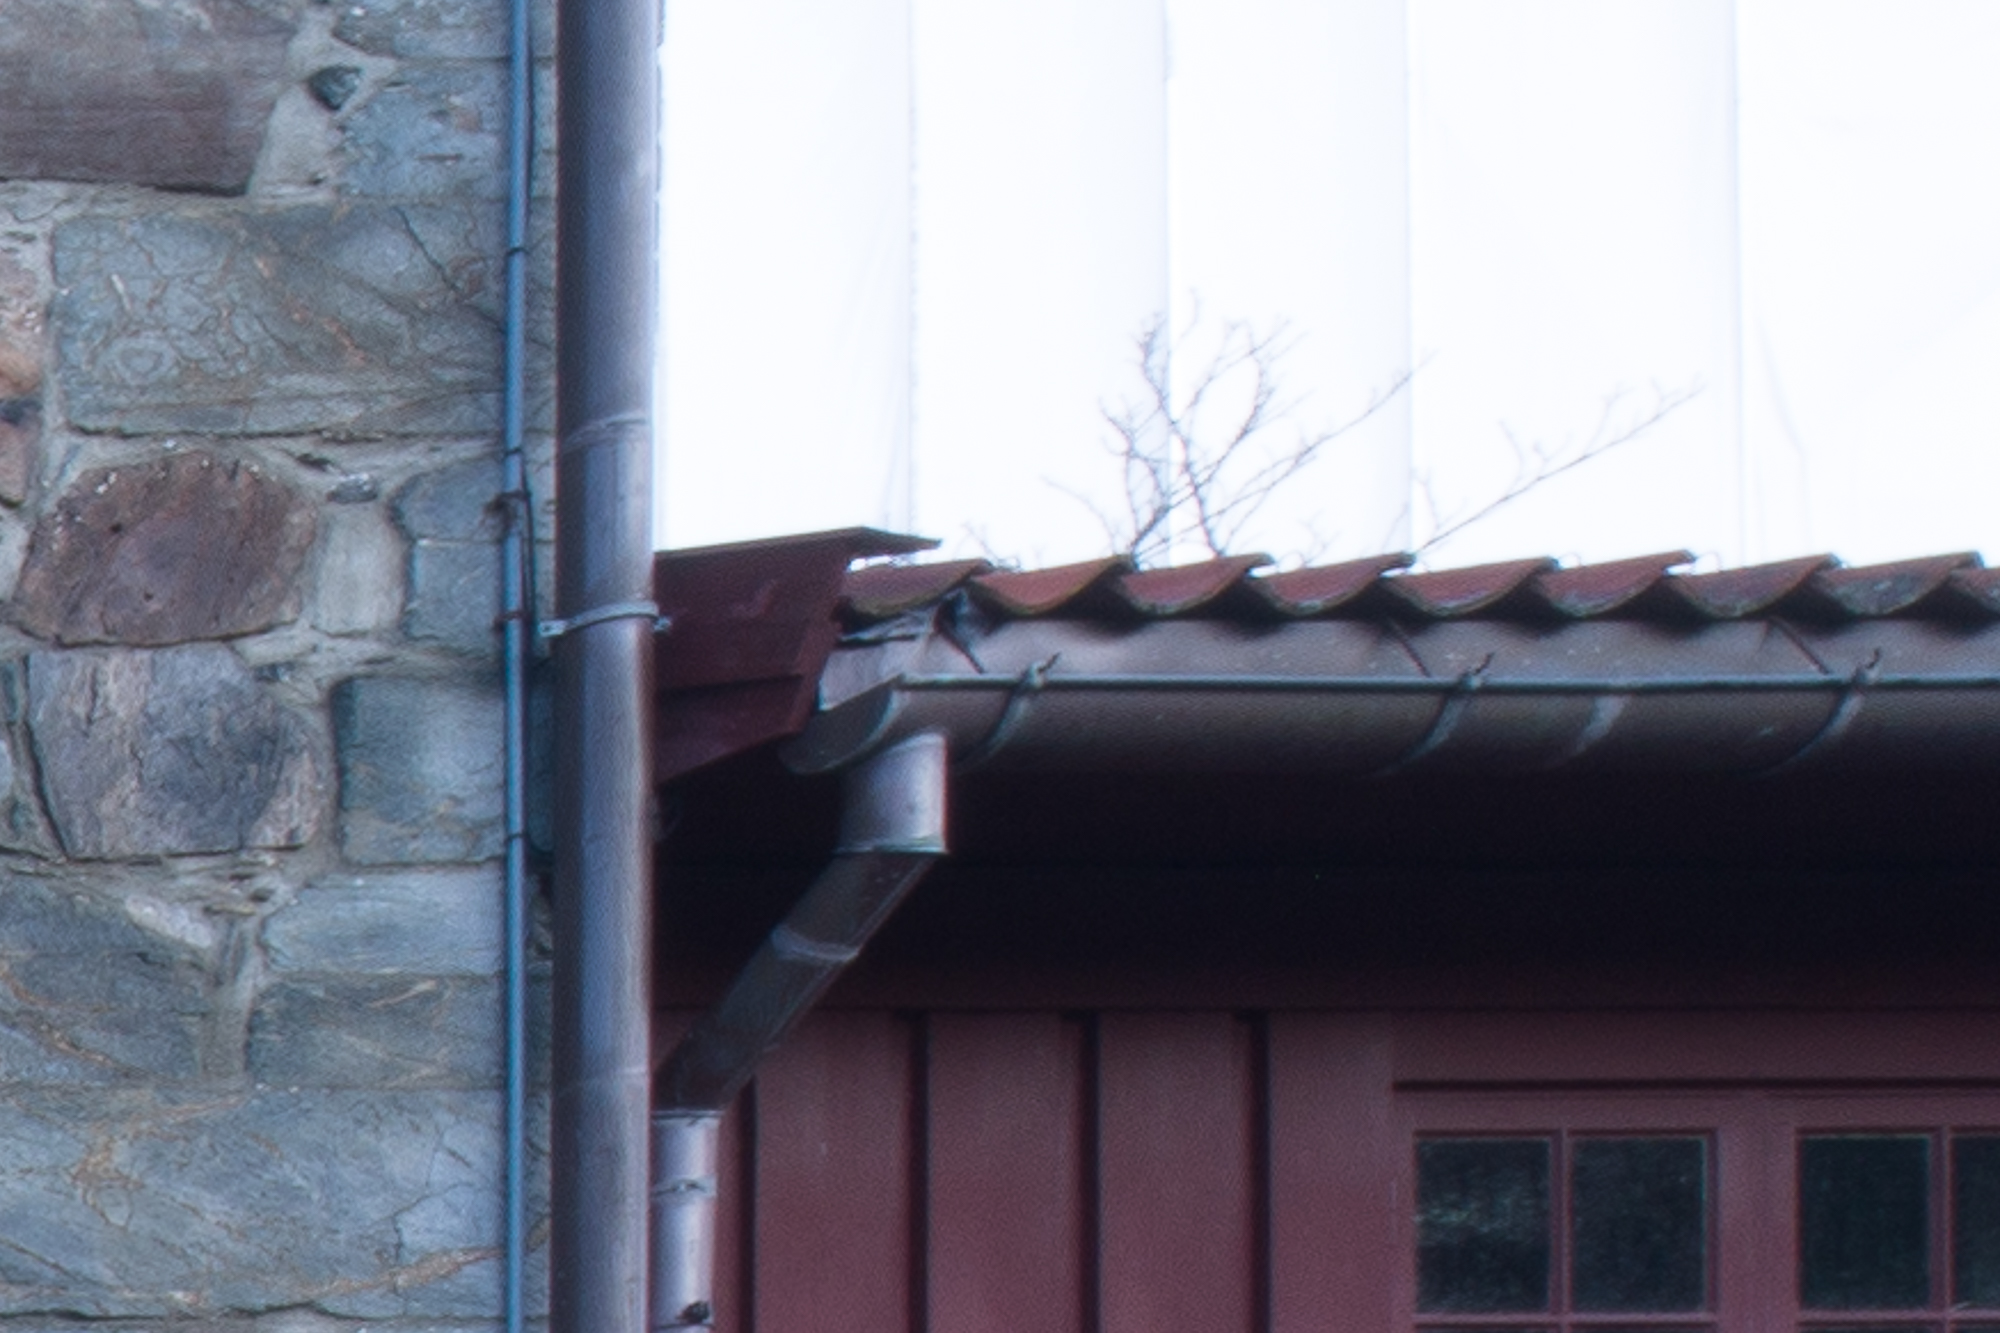
The red squares corresponds to the parts of the image evaluated at 200% below. The center is the same as the full-frame 2:3 crop described above, so we’ll skip that here. This time, let’s study the right image border. As before, left image below has only been raw-sharpened, right image is with Topaz sharpen AI.

And finally, just for the fun of it, a brief comparison of the center portion of the frame with the xcd 21mm. The borders and corner are obviously out of reach for the 21mm, so no point in comparing those.

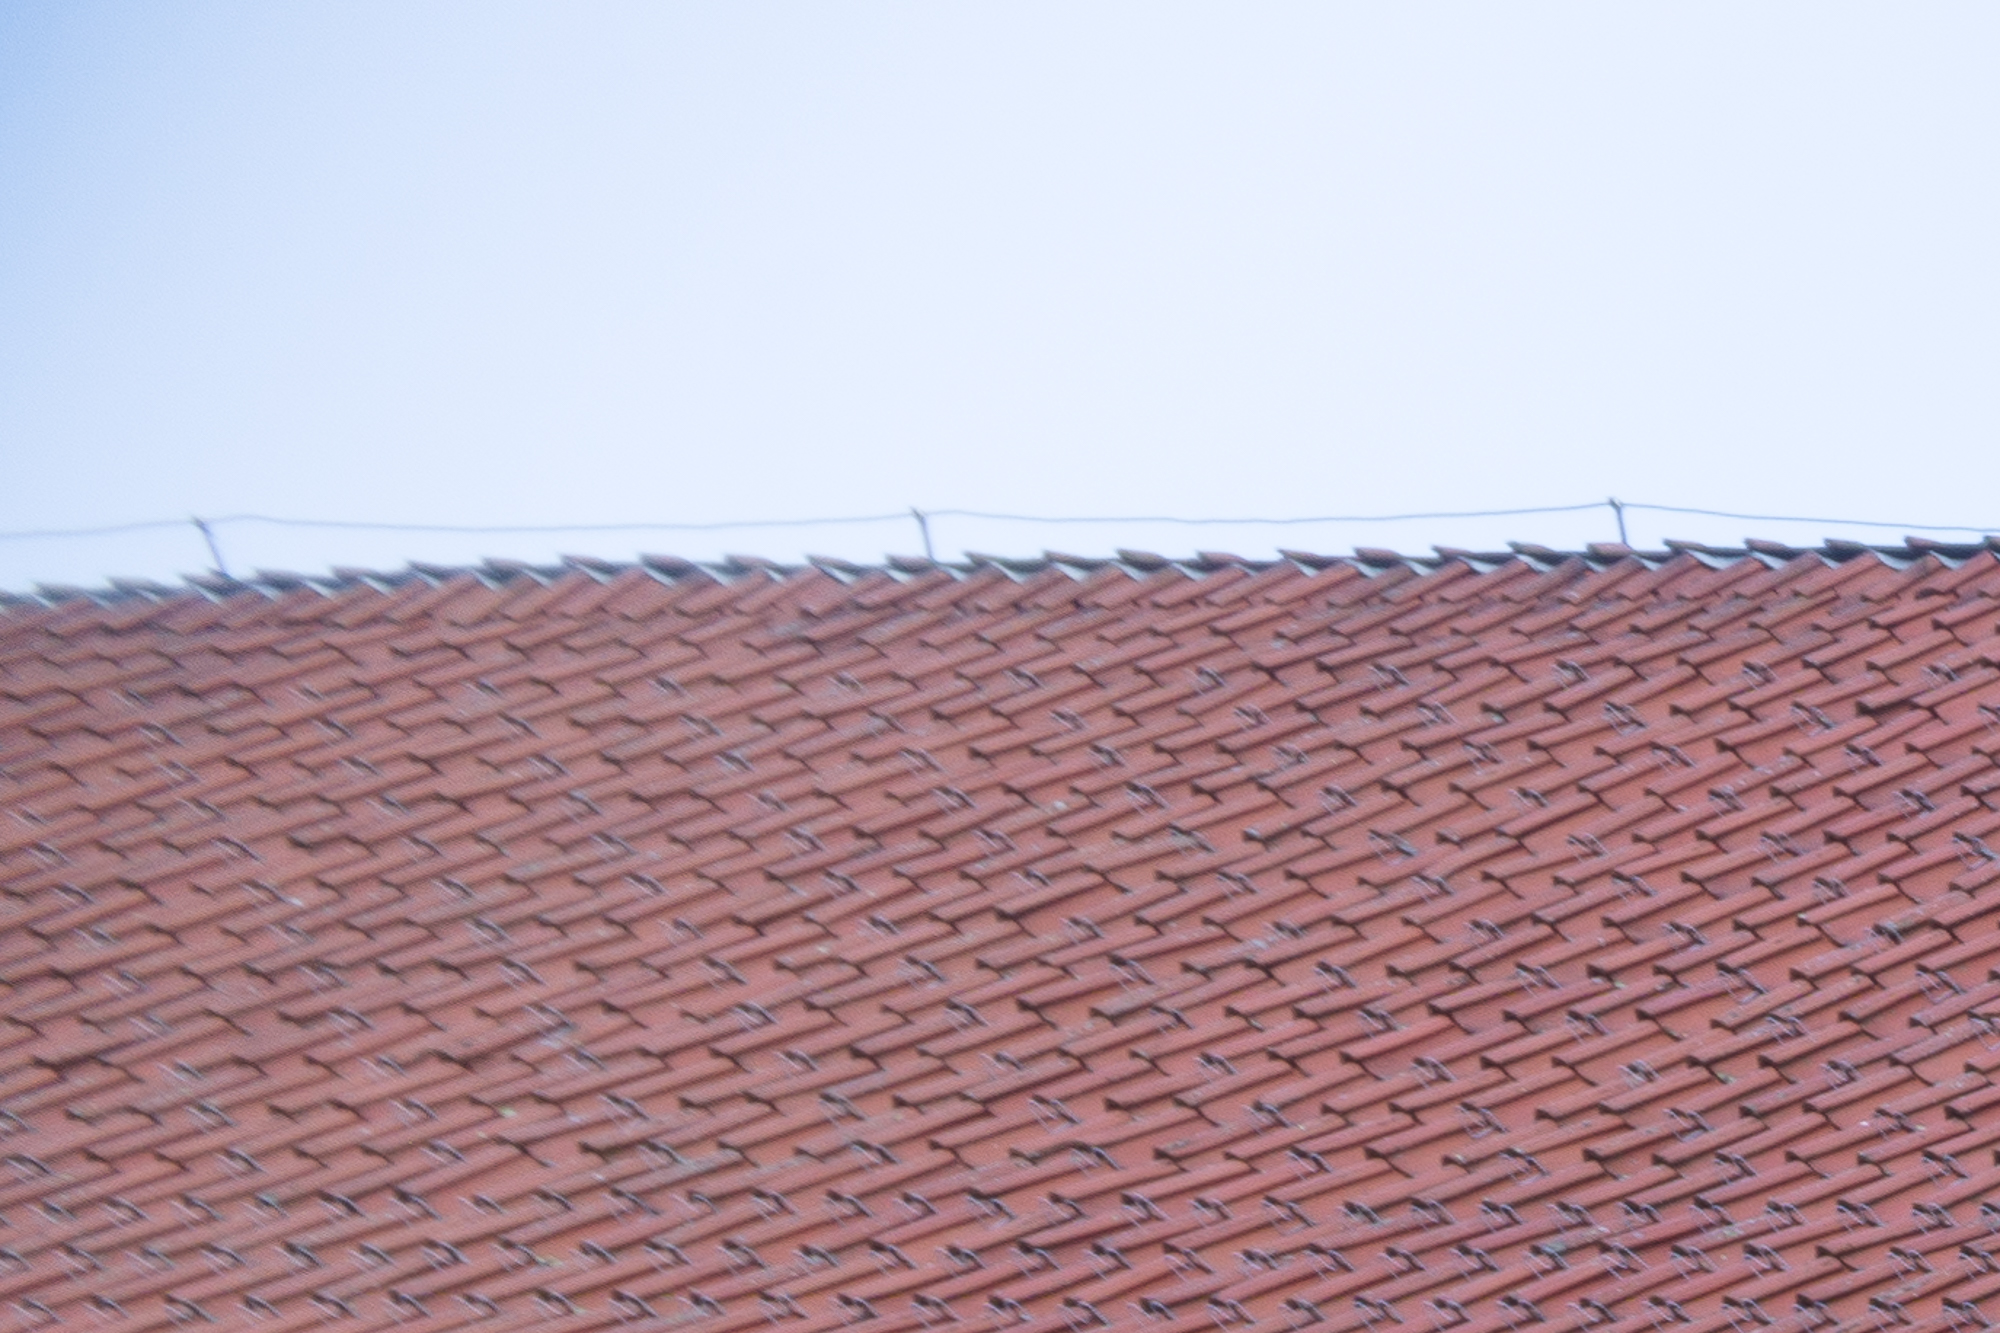
I am positively surprised by the sharpness of this lens. There is not much to complain about in the center of the image. Sharpness and contrast is excellent. Even when compared with the fabulous xcd 21mm. Midframe, although not shown specifically here, is pretty much the same. The edges are also good enough for me, especially on the 3:2 crop. Surprisingly, they are also good when employing the full width of the sensor with the 64:25 crop. If you can live with a little Topaz sharpen AI, edges can turn out excellent. The very, very extreme corners suffer from severe smearing. It cleans mostly up with Topaz sharpen AI, but it is definitely something to keep in the back of your mind if the scene has something of great importance in the uttermost corners.
Fringing

There is surprisingly little fringing, even in this high-contrast scene, at f11. I haven’t looked at it on other apertures, so I cannot comment on that. Anyway, the little fringing I can find, cleans up nicely with one click in Lighroom.
Conclusions and examples
The need for an ultrawide lens on the Hasselblad X2D can always be debated. As mentioned in my last post and in the introduction here, I can definitely see a couple of different applications for it in my type of work. As long as we don’t have any original Hasselblad alternatives, I will have to settle with (full-frame) third party options.
I was positively surprised by this lens. Optically, it is quite good, even when used on the X2D’s medium format sensor. You definitely need to know the limitations though; hard and soft vignetting being the first to address and maybe the most important. As long as it is used at the settings described (f11, 3:2 or 64:25 crop) and handled properly in postprocessing, it opens up quite a few possibilities for me. It will definitely be in my bag when I plan for ultrawide scenes.
I will investigate the properties at other focal lengths in the future. There might be a few surprises there. Maybe the hard vignette can be avoided completely when zooming in, minimizing the need to crop? Maybe edge- and corner sharpness improves when zooming slightly in? Or maybe everything falls apart at 15mm? And how is it in the longest end? It will be a fun test to do for sure.
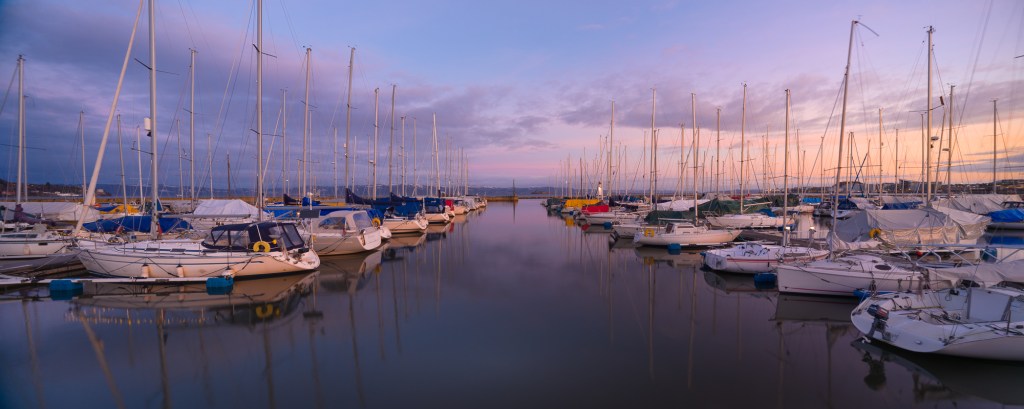
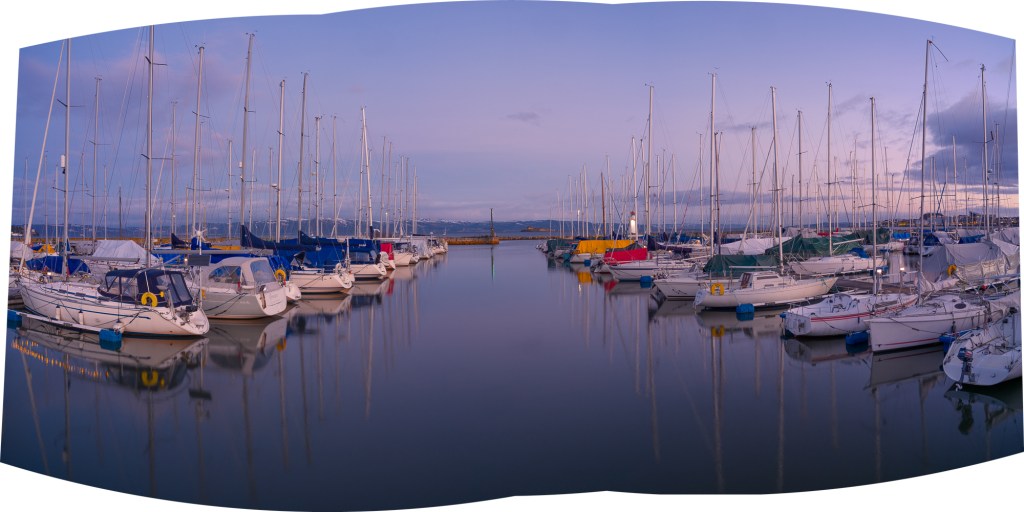
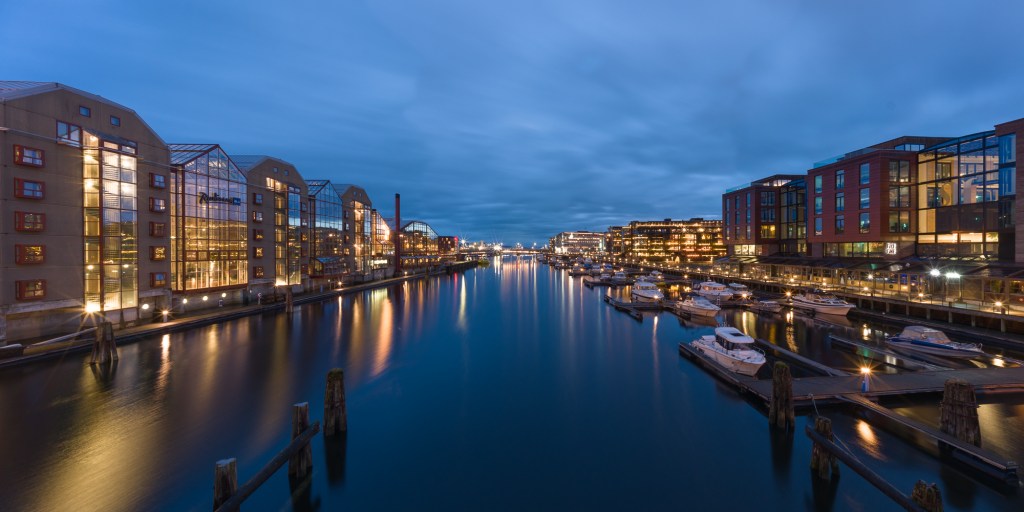
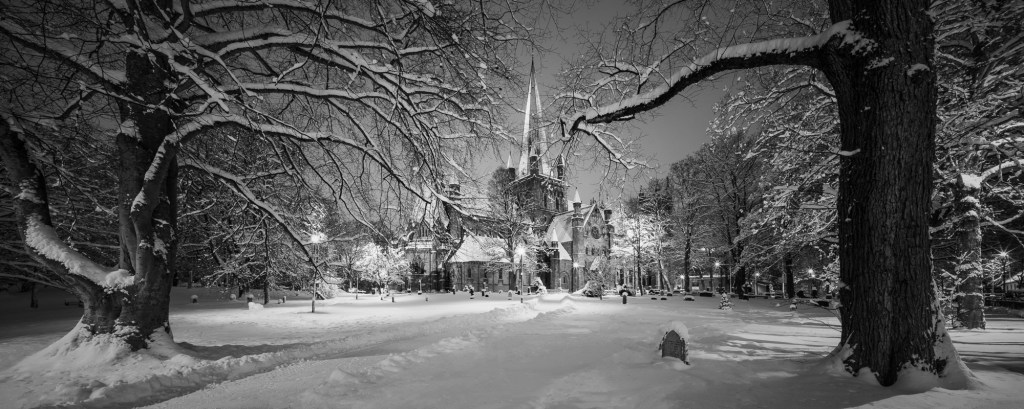
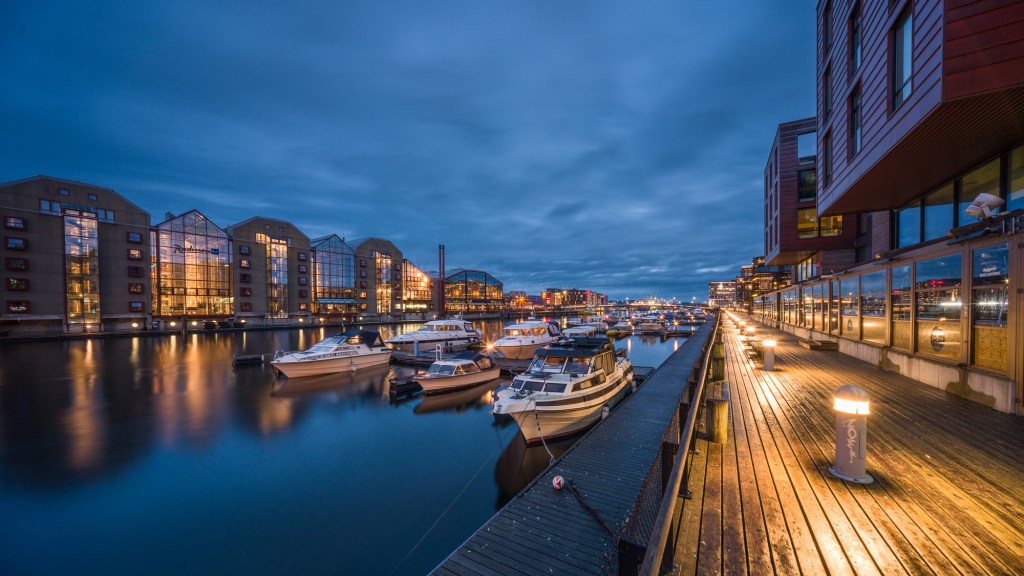
I have only used this lens on a few occasions so far, but enough to say that I’m getting acquainted with it. Below are a few examples. These are all scenes where I would have struggled to stitch a pano with one of my original Hasselblad lenses, so the ultrawide definitely came in handy.